Soundproofing is a science that needs careful planning and execution. It’s important to know how sound travels and the materials that block or absorb it.
Knowing soundproofing tips and techniques helps you avoid common mistakes. This guide will show you how to make your soundproofing project successful.
You’ll learn to spot potential problems and use effective soundproofing techniques. This way, you can create a quieter space.
Understanding the Basics of Soundproofing
Before we explore soundproofing solutions, let’s understand how sound moves and interacts with materials. Soundproofing is key to a quiet and productive space, whether at home, work, or in a recording studio.
What is Soundproofing?
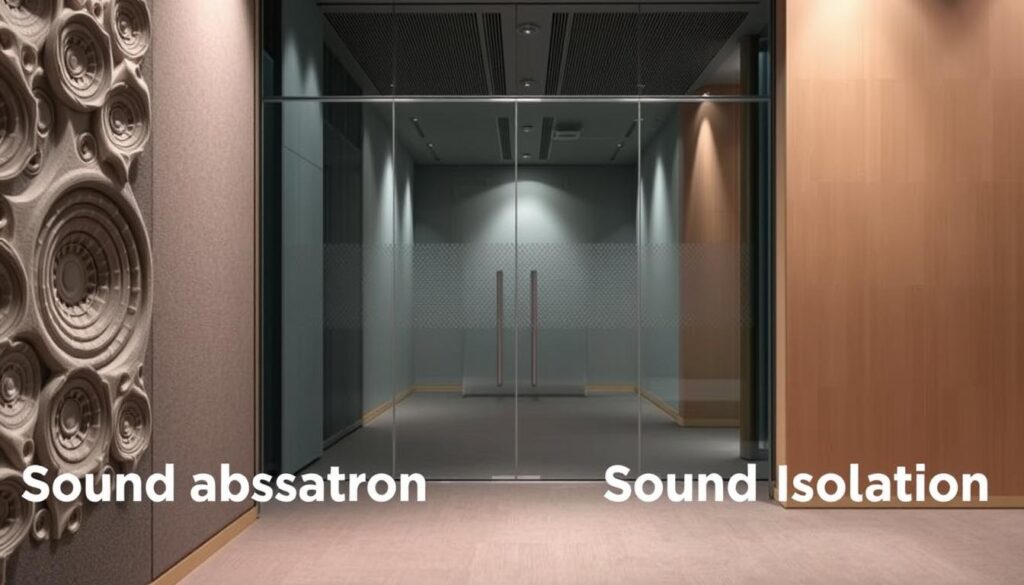
Soundproofing creates a barrier between noise sources and listeners. It uses noise reduction methods and soundproofing solutions. Knowing how sound works and the right materials to block or absorb it is essential.
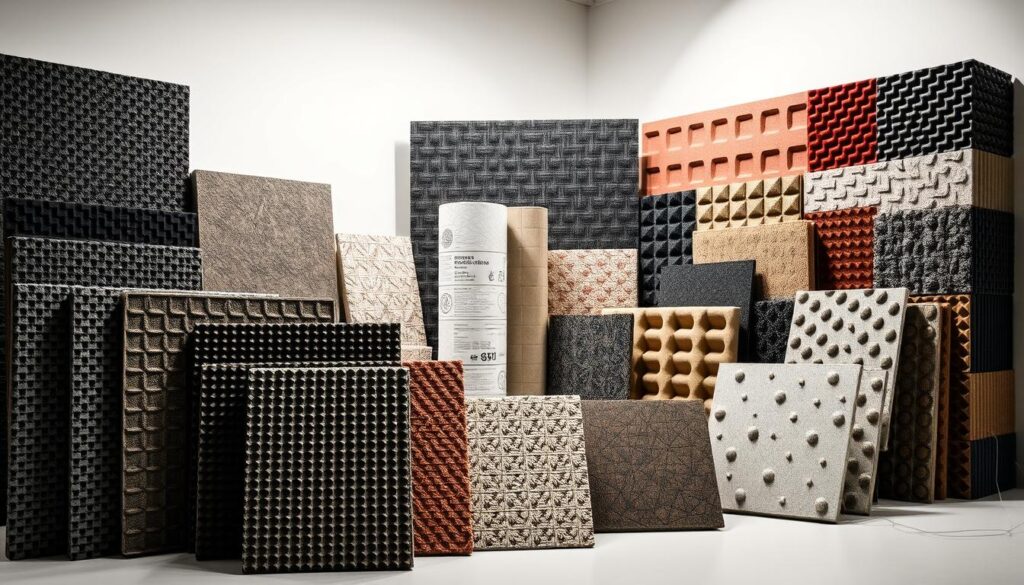
Some common soundproofing materials include:
- Acoustic panels
- Soundproofing blankets
- Mass-loaded vinyl
- Acoustic caulk
How Sound Travels in Buildings
Sound moves through buildings in several ways, like through the air, walls, floors, and ceilings. Knowing how sound spreads helps find the best soundproofing methods.
To soundproof a room well, you must block sound paths. This means sealing gaps, using sound-absorbing materials, and decoupling structures to cut down sound transmission.
Key soundproofing points include:
- Identifying noise sources
- Checking the room’s acoustics
- Picking the right soundproofing materials
Mistake #1: Overlooking Room Acoustics
When soundproofing, ignoring room acoustics is a big mistake. Knowing how sound moves in a room is key. It affects how soundproofing works.
To avoid this mistake, first check the room’s acoustics. Look at where sound comes from, how it moves, and how it sounds in the room. Clap your hands or make a loud noise to see how sound echoes. Notice the echo and resonance to understand the room’s sound.
Choosing the right soundproofing materials is also important. Different materials block sound in different ways. For example, acoustic insulation helps block sound through walls and ceilings. Here’s a list of common materials and their uses:
- Mass Loaded Vinyl: Good against low sounds
- Acoustic Panels: Cut down echo and reverberation
- Soundproofing Blankets: Portable and good for sound absorption
- Acoustic Caulk: Seals gaps to stop sound leaks
| Material | Use | Effectiveness |
|---|---|---|
| Mass Loaded Vinyl | Walls, Ceilings | High |
| Acoustic Panels | Walls, Ceilings | Medium |
| Soundproofing Blankets | Portable, Versatile | Medium |
| Acoustic Caulk | Gaps, Joints | High |
By knowing your room’s acoustics and picking the right materials, you can make your soundproofing better. This careful planning helps you get the quiet, comfy space you want.
1: Overlooking Mass and Density
When you’re into soundproofing DIY, it’s easy to miss something important. The mass and density of your materials play a big role. They help block or absorb sound effectively.
It’s key to pick materials that are dense. This stops sound waves from getting through. Thick, heavy panels or adding mass to walls can really help. Knowing about mass and density helps you choose the right materials for your soundproofing best practices project.
This way, you can make a soundproofing solution that really works for you.
Mistake #2: Ignoring Air Gaps
Ignoring air gaps is a big mistake in soundproofing. Air gaps are small openings around doors, windows, and other spots. They let sound through, ruining your soundproofing plans.
To fix this, find and seal all air gaps. Look for gaps around doors and windows. Use acoustic sealant or spray foam to block them. Also, seal electrical outlets and switches on shared walls with acoustic putty pads.
Common Areas for Air Gaps:
- Around doors and windows
- Electrical outlets and switches on shared walls
- Gaps between baseboards and floors
- Openings around pipes and HVAC systems
Sealing these gaps greatly boosts your soundproofing. Here’s a simple table showing how air gaps affect soundproofing:
| Air Gap Size | Sound Transmission | Impact on Soundproofing |
|---|---|---|
| 1/8 inch | Significant sound leakage | High |
| 1/4 inch | Major sound transmission | Very High |
| Sealed | Minimal sound transmission | Low |
https://www.youtube.com/watch?v=xiqBG9X3IQ8
Understanding the need to seal air gaps is key. By doing so, you can greatly improve your soundproofing. This will lead to better results.
2: Ignoring Air Gaps
When it comes to soundproofing advice, air gaps are often ignored. This oversight can lead to poor soundproofing results. It’s crucial to understand the importance of sealing these gaps.
To effectively soundproof, you need the right materials and techniques. This means choosing the right sealants. Also, make sure to seal doors, windows, and other gaps tightly.
By following soundproofing guidance, you can improve your space’s soundproofing. Paying attention to sealing air gaps is key. This effort will help you achieve better sound reduction and a more peaceful environment.
Mistake #3: Skipping the Decoupling Process
Many people make the mistake of skipping the decoupling process. Decoupling means separating materials to stop sound from moving through a building. It makes soundproofing products and soundproofing technologies work better.
To decouple materials, you can use resilient channels or soundproofing clips. These tools create a gap between the material and the stud. For example, using resilient channels when installing drywall can greatly improve soundproofing. It’s also key to make sure the decoupling materials are installed right to avoid touching the building structure.
- Failing to completely separate the materials, which can lead to sound leakage.
- Using inadequate decoupling materials that are not designed for soundproofing.
- Not ensuring that the decoupling materials are properly secured to prevent movement or vibration.
To get good soundproofing, understanding and using decoupling correctly is vital. It helps a lot in making your building soundproof better. Effective decoupling is key to successful soundproofing. It’s something you should not ignore when buying soundproofing products and soundproofing technologies.
3: Skipping the Decoupling Process
Decoupling is key in soundproofing installation. It stops sound vibrations from moving between structures. This step is vital for good soundproofing.
It might seem like skipping decoupling saves time. But, it can ruin your soundproofing efforts. Using the right materials and techniques for decoupling is crucial. It’s also important for soundproofing maintenance.
Knowing how to decouple correctly is essential. It makes your soundproofing project a success. You’ll get a quieter space, free from noise.
Mistake #4: Using Inadequate Acoustic Treatments
One big mistake in soundproofing is picking the wrong acoustic treatments. Using treatments that don’t work well can ruin your soundproofing goals. This means you won’t get the soundproofing benefits you’re hoping for.
To avoid this mistake, it’s key to know how acoustic treatments work. They soak up sound energy, cutting down on echo and reverberation. But, not all treatments are the same. Using the wrong one can mess up your soundproofing plans.
- First, figure out what frequency range you need to tackle. Different materials work better on different frequencies.
- Think about the type of sound you’re trying to block. For example, some treatments work on a wide range of sounds, while others target specific ones.
- Make sure the materials fit your space. For instance, some panels look good but might not work well in humid places.
The table below shows some common acoustic treatments and what they do:
| Acoustic Treatment | Frequency Range | Effectiveness |
|---|---|---|
| Acoustic Panels | Mid-to-high frequencies | High |
| Bass Traps | Low frequencies | High |
| Diffusers | Broadband | Medium |
By picking the right acoustic treatments, you can boost the soundproofing advantages of your project. This will help you get a better soundproofing result.
4: Using Inadequate Acoustic Treatments
When you use the wrong acoustic treatments, you hit a roadblock in soundproofing. It’s all about picking the right materials and methods for the job.
Choosing the wrong materials can really set you back. To beat soundproofing obstacles, you need to pick the right treatments. Knowing what your project needs is key.
With the right materials and methods, your soundproofing project will thrive. This boosts quality and keeps soundproofing challenges at bay.
Mistake #5: Focusing Solely on Walls
Effective soundproofing needs a full plan, not just wall focus. When soundproofing, don’t overlook other key areas.
Surprisingly, ceilings and floors are crucial too. Sound moves through them as well as walls. So, they must be part of your soundproofing strategy.
Common Pitfalls:
- Ignoring the ceiling’s role in soundproofing
- Failing to address floor vibrations and impact noise
- Not considering the interplay between different surfaces
To avoid these mistakes, take a complete soundproofing approach. Check all surfaces and find weak spots in your plan.
| Surface | Soundproofing Considerations | Effective Solutions |
|---|---|---|
| Walls | Mass, density, and decoupling | Adding mass-loaded vinyl or acoustic panels |
| Ceilings | Sound transmission and absorption | Installing acoustic tiles or resilient channels |
| Floors | Impact noise and vibrations | Using underlayment materials or soundproofing blankets |
By covering all surfaces with soundproofing, you’ll greatly enhance your room’s sound quality.
Soundproofing isn’t just about walls. It’s about making a full sound barrier around all surfaces. This way, you get a quieter, more peaceful space.
5: Focusing Solely on Walls
You might think that focusing on walls is enough for effective soundproofing. But, that’s not the case. If you only focus on walls, you might not get the best results.
To get good soundproofing, you need the right materials and techniques. Use mass-loaded vinyl or acoustic panels on walls. Also, seal gaps around doors and windows. And, don’t forget to use sound-absorbing materials on ceilings and floors.
Some soundproofing tips include finding and fixing weak spots in your room’s soundproofing. Look for gaps or cracks. Use the right materials for these jobs. By doing these soundproofing tricks, you can make your space much quieter.
Mistake #6: Neglecting the Doorways
Ignoring doorways can ruin your soundproofing plans. Doorways are a weak spot, letting sound in or out. It’s key to seal them well for soundproofing.
Start with a soundproof door to block sound. Also, use acoustic sealant to fill gaps in the door frame. For better soundproofing, add a door sweep or threshold seal at the door’s bottom.
- Use a solid core or soundproof door.
- Seal gaps around the door frame with acoustic sealant.
- Install a door sweep or threshold seal.
For more soundproofing tips, check out Soundproof Spaces. They offer many solutions. By focusing on doorways, you can greatly improve your soundproofing.

6: Neglecting the Doorways
Sealing doorways is key to soundproofing, yet often ignored. Skipping this step can ruin your soundproofing efforts. It makes your project less effective.
Using the right materials and techniques is crucial. You must pick the best soundproofing materials and soundproofing tools for sealing doorways.
To succeed, knowing the common mistakes is important. Avoiding these pitfalls helps you get the soundproofing you want. This way, you can enjoy a quieter space.
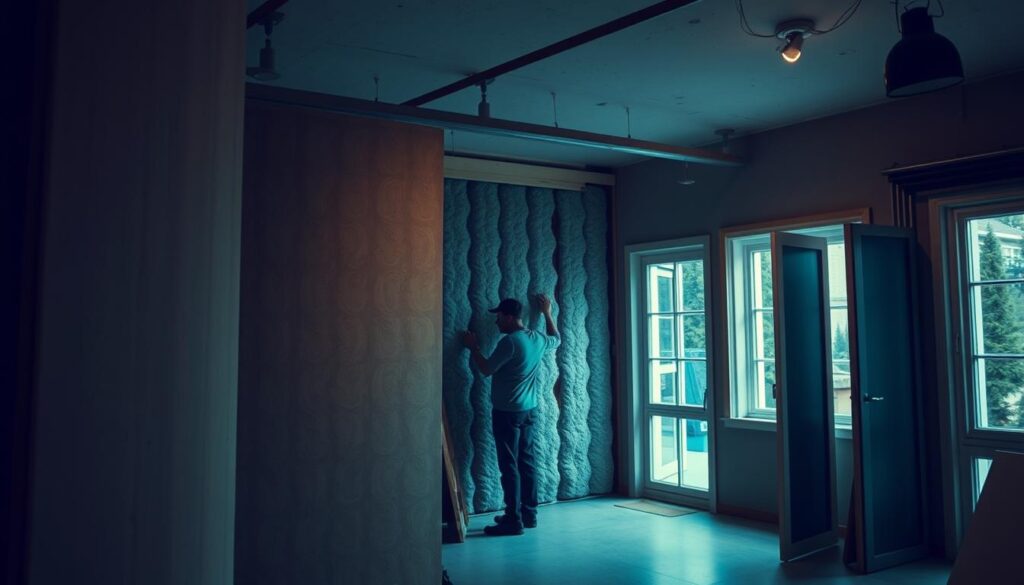
Soundproofing DIY: A Cost-Effective Solution
Embarking on a DIY soundproofing project can be a cost-effective way to enhance your home’s acoustics. With the right materials and a bit of effort, you can significantly reduce noise levels and create a more comfortable living environment.
Materials Needed
To start your soundproofing DIY project, you’ll need a few essential materials. These include:
- Mass Loaded Vinyl: This is a heavy, flexible sheet that can be applied to walls and ceilings to absorb sound waves.
- Acoustic Panels: These panels are designed to absorb sound energy, reducing echo and reverberation in rooms.
- Sealants: Products like caulk and spray foam are crucial for sealing gaps and cracks in walls and floors, preventing sound from escaping or entering.
Step-by-Step Guide
Here’s a step-by-step guide to help you get started with your soundproofing DIY project:
- Assess Your Space: Begin by identifying the areas where soundproofing is most needed. This could be a home theater room, a music practice space, or a bedroom.
- Prepare the Area: Clean the walls and surfaces thoroughly to ensure a smooth application of materials.
- Apply Mass Loaded Vinyl: Use a putty knife to spread the vinyl evenly, ensuring full coverage of the area.
- Install Acoustic Panels: Hang the panels on walls and ceilings, following the manufacturer’s instructions for optimal placement.
- Seal Gaps and Cracks: Use caulk and spray foam to seal any gaps or cracks in walls, floors, and ceilings.
- Test and Adjust: Once all materials are in place, test the soundproofing by playing music or white noise. Make any necessary adjustments to achieve the desired level of soundproofing.
By following these steps and using the right materials, you can effectively soundproof your space without breaking the bank. Remember, soundproofing DIY projects require patience and attention to detail, but the results can be well worth the effort.
7: Misjudging Windows’ Impact
Windows play a big role in soundproofing your space. Not understanding their impact can lead to poor results. It’s key to use the right materials and techniques.
To get good soundproofing, pick the right materials and methods. Follow soundproofing best practices and stick to soundproofing standards. This way, your project will be a success and meet your needs.
Knowing the potential problems and how to avoid them helps. You can then achieve the soundproofing you want. This makes your environment more peaceful.
Mistake #8: Failing to Consider HVAC Noise
One of the most common soundproofing mistakes is ignoring the noise from HVAC systems. These systems keep your space comfortable but can also be very noisy. This noise can ruin your soundproofing plans.
When planning your soundproofing, think about HVAC noise. You need to choose the right materials and design the HVAC system carefully. Proper planning helps reduce the noise from these systems. This makes your soundproofing work better.
- Select HVAC systems that are designed to operate more quietly.
- Ensure proper installation of the HVAC system to minimize noise generation.
- Use sound-absorbing materials around the HVAC system to reduce noise transmission.
- Consider the layout of the HVAC ductwork to minimize noise propagation through the ducts.
By tackling HVAC noise in your soundproofing plan, you can make your space quieter. This makes it more comfortable for everyone.
8: Failing to Consider HVAC Noise
When you think about soundproofing, you might focus on materials and techniques. But, it’s easy to overlook HVAC noise. This oversight can lead to soundproofing pitfalls that are hard to fix.
To avoid soundproofing traps, it’s key to understand HVAC noise’s role. Choosing the right materials and methods can lead to great soundproofing. This means paying attention to the noise from your heating, ventilation, and air conditioning systems.
Good soundproofing means looking at all noise sources, including HVAC. This way, you can make your space quieter. And you’ll save money by avoiding expensive fixes later on.
Conclusion
To get soundproofing right, it’s key to avoid common mistakes. Understanding mass, density, and proper installation is crucial. This way, you can greatly improve your soundproofing success.
Soundproofing well needs careful planning and doing. First, find out where the noise is coming from. This helps you focus your efforts. Using materials like mass-loaded vinyl and thick drywall also helps a lot. For more tips on avoiding mistakes, check out Union Acoustic’s guide.
By using the advice from this article, you can make your space quieter and more peaceful. Good soundproofing makes your living or work area better. It also improves your overall well-being.