Creating a top-notch recording space doesn’t have to cost a lot. You can make a professional-grade soundproofing area at home with the right stuff and methods.
Don’t worry if framing walls and hanging drywall seem daunting. Soundproof blankets are a simpler, less work option. They’re easy to move or remove, say experts.
This guide will show you how to build a soundproof booth. We’ll cover planning, design, materials, and how to put it all together. By using these soundproof booth construction tips, you can make a great recording space that fits your needs.
Understanding Soundproofing and Its Benefits
To get professional-grade recordings, knowing about soundproofing is key. It’s all about making a space where top-notch audio can be recorded without outside noise or leaks.
Soundproofing cuts down sound moving from one area to another. This is vital for recording, as it knocks out background noise and keeps sound in, making recordings better and more professional.
What is Soundproofing?
Soundproofing means stopping sound from getting in or out of a certain area. It uses things like acoustic panels and materials to block sound. It also involves sealing up gaps where sound could sneak through.
Good soundproofing needs a full plan, looking at the room’s build, materials, and what it’s for. Whether you’re recording music, podcasts, or voiceovers, a solid soundproofing plan is essential.
Why Build a Soundproof Booth?
Building your own soundproof booth can save money compared to buying a pre-made one. You can make it fit your needs and budget perfectly, ensuring it’s just right for your recordings.
A soundproof booth gives you a dedicated spot for recording, away from outside noise and distractions. This boosts your recording’s quality and makes the whole process better.
Applications of a Soundproof Booth
Soundproof booths are useful in many places, from pro recording studios to home offices and hobbyist areas. They’re great for anyone needing to record top-quality audio, like musicians, podcasters, voiceover artists, and YouTubers.
| Application | Description | Benefits |
|---|---|---|
| Recording Studios | Professional-grade recording environments | High-quality audio, reduced echo and reverberation |
| Home Offices | Quiet spaces for video conferencing and voiceovers | Improved audio quality, reduced distractions |
| Hobbyist Spaces | Personal recording studios for enthusiasts | Enhanced recording quality, increased creativity |
By grasping soundproofing basics and the perks of a soundproof booth, you can craft a recording area that suits your needs and boosts your audio. Whether you’re a pro or just starting out, a well-thought-out soundproof booth is a smart investment for your recording journey.
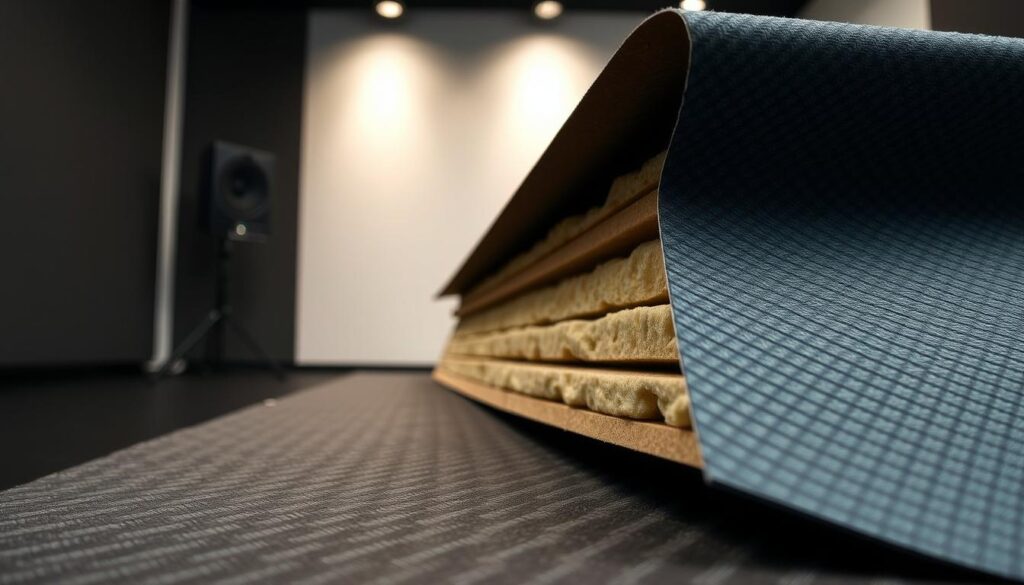
Materials You Will Need
Choosing the right materials is key when building a soundproof booth. The right stuff helps block sound well. This is important for recording, music practice, or just needing quiet.
Acoustic Foam Panels
Acoustic foam panels are vital for soundproofing. They soak up sound waves, cutting down on echo and reverberation. You can pick from different shapes, sizes, and densities to fit your needs. For a soundproof recording booth, choose panels made for sound absorption.
Soundproofing Curtains
Soundproofing curtains are great for blocking sound. They’re heavy and dense, perfect for hanging over windows or dividing areas. They help keep out external noise and stop sound from getting out. Look for curtains with high mass and density.
Additional Soundproofing Materials
There are more materials to boost your soundproof booth. R-19 fiberglass insulation between studs can really help. Other items like mass-loaded vinyl, acoustic caulk, and door seals also cut down on sound leakage.
| Material | Purpose | Benefits |
|---|---|---|
| Acoustic Foam Panels | Sound absorption | Reduces echo and reverberation |
| Soundproofing Curtains | Sound blocking and absorption | Minimizes sound leakage and external noise |
| R-19 Fiberglass Insulation | Soundproofing and thermal insulation | Improves soundproofing and energy efficiency |
By picking and using these materials wisely, you can make a soundproof booth that works well. Whether it’s for personal or professional use, the right materials are crucial.
Planning Your Booth Design
## Planning Your Booth Design
A well-designed soundproof booth is key for the bestacoustic treatment for your DIY booth. To make your soundproofing work well, plan your booth design carefully. Think about location, size, and layout.
### Choosing the Location
When picking a spot for your soundproof booth, think about the area around it. You want it in a quiet spot, away from loud places and outside noise. For more tips on building a vocal booth, check outthis article.
### Size Considerations
The booth’s size depends on its use and the space you have. Consider these points:
- The number of people using the booth
- The equipment you’ll use
- The space you have at home or in your studio
### Layout and Dimensions
For a soundproof booth that works well, think about its layout and size. Here are some tips:
- Make the booth as small as you need it to be
- Choose a rectangular shape to cut down on echo and sound reflections
- Think about where to put doors, windows, and vents
By planning your booth design well, you can build a safe and soundproof space. Make sure to seal all air gaps to prevent sound leaks. This will help yoursoundproof booth insulation techniques work better.
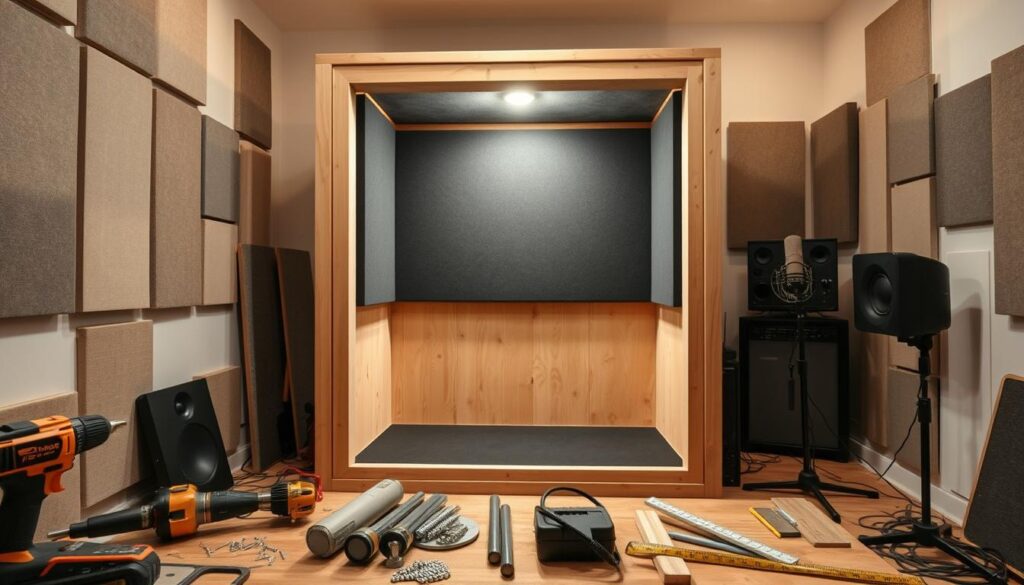
Building Your Soundproof Booth Frame
Building the frame of your soundproof booth is where your project begins. A strong frame is key for holding soundproofing materials and keeping the booth stable.

Selecting the Right Wood
Choosing the right wood for your frame is important. You need wood that’s strong enough to hold the booth’s structure. 2×4 lumber is a good choice because it’s strong and affordable. For extra strength, consider using oriented strand board (OSB) or plywood for the frame’s sheathing.
Constructing the Frame
To start, build the base and make sure it’s level. Then, build the walls, ensuring they’re straight and well-attached to the base. Use screws for better stability. For better soundproofing, build a double wall system with resilient channels in between.
Ensuring Structural Stability
Keeping your booth frame stable is crucial. Add bracing for extra support, more so for larger booths. Ensure all joints are tight and consider construction adhesive for extra strength. A stable frame supports soundproofing materials and extends your booth’s life.
By following these steps and using the right materials, you can build a solid frame for your soundproof booth. A well-made frame is the base of a successful soundproofing project.
Installing Soundproofing Panels
Soundproofing panels are key to reducing echo and sound leaks in your recording booth. When setting up a soundproof booth, installing these panels is crucial. You need to pick the right acoustic panels and install them correctly.
Types of Acoustic Panels
There are many types of acoustic panels for soundproof booths. Each has its own benefits and features. Here are the most common ones:
- Absorption Panels: These panels soak up sound energy, cutting down on echo and reverberation.
- Diffusion Panels: These panels spread sound waves out, making the sound field more even.
- Reflection Panels: Used to bounce sound waves back to the source, improving sound quality.
Proper Installation Techniques
To get the most out of your soundproofing panels, follow these installation tips:
- Mount panels on walls and ceilings to cover more surface area.
- Use a mix of absorption, diffusion, and reflection panels for a balanced sound environment.
- Make sure panels are securely attached to prevent them from moving or falling.
Covering Gaps and Seams
Sealing gaps and seams is vital to keep sound from leaking. Here’s how to do it:
- Use acoustic sealant to fill gaps around panels and openings.
- Ensure all joints and seams are tightly sealed.
- Regularly check the booth for any sound leaks and fix them.
| Type of Panel | Purpose | Installation Tip |
|---|---|---|
| Absorption Panels | Reduce reverberation and echo | Mount on walls and ceilings |
| Diffusion Panels | Scatter sound waves for a more even sound field | Use in combination with absorption panels |
| Reflection Panels | Direct sound waves back to the source | Position strategically to enhance sound quality |
By choosing and installing the right soundproofing panels, and sealing all gaps and seams, you can greatly improve sound quality in your recording booth.
Adding Doors and Windows
Adding doors and windows is key to making a soundproof booth work well. It makes your booth more useful and keeps it soundproof. You have many options for doors and windows, each with its own benefits.
Choosing Hinged or Sliding Doors
Deciding on a door type is important. You can pick between hinged and sliding doors. Hinged doors seal well but need more space. Sliding doors save space but might not seal as well without special seals.
Think about the space you have and what you need. Sliding doors might be better if you’re short on space.
| Door Type | Space Requirement | Sealing Efficiency |
|---|---|---|
| Hinged Doors | High | High |
| Sliding Doors | Low | Moderate to High (with proper sealing) |
Installing Soundproof Windows
Soundproof windows are key for keeping your booth quiet. You can get special soundproof windows or make your current ones better. Using Quiet Quilt 2-sided barrier blanket or similar materials can help.
Make sure your soundproof windows are sealed well to block sound. You might need extra materials around the frames.
Sealing Gaps Around Openings
Sealing gaps is crucial, no matter your door or window choice. Use acoustic caulk or weatherstripping to fill gaps. This keeps your booth soundproof.
- Check all gaps around doors and windows.
- Use the right materials to seal them tight.
- Test your booth to make sure it’s still soundproof.
Choosing and installing doors and windows right, and sealing them well, boosts your soundproof booth’s performance. It helps with your soundproof booth project ideas and improves your DIY booth’s acoustics.
Enhancing Soundproofing with Insulation
Insulation is a key player in soundproofing, making spaces quieter and more controlled. It’s often overlooked, but it’s crucial for reducing echo and outside noise. Think of it as the secret ingredient in your soundproofing recipe.
Types of Insulation for Soundproofing
There are many types of insulation for soundproofing, each with its own strengths. Here are some of the most effective ones:
- Fiberglass Insulation: It’s affordable and great at blocking sound.
- Acoustic Insulation: Made for soundproofing, it absorbs sound well.
- Spray Foam Insulation: It seals and soundproofs very well.
When picking insulation, think about what your soundproof booth needs. For example, if you want to cut down on echo, go for acoustic insulation.
Installing Insulation Properly
Getting insulation installed right is key to its success. Here are some tips to help you do it correctly:
- Make sure the area is clean of debris and dust.
- Cut the insulation to fit perfectly between walls or in frames.
- Use acoustic clips and furring channels on ceilings and walls for better soundproofing.
Experts say using acoustic clips and furring channels can really boost your booth’s soundproofing.
Benefits of Insulation in Your Booth
Insulation in your soundproof booth offers many benefits. It cuts down on outside noise and reduces echo and sound reflections. This creates a quieter, more controlled space, perfect for recording or other quiet tasks.
| Insulation Type | Soundproofing Effectiveness | Cost |
|---|---|---|
| Fiberglass | High | Low |
| Acoustic Insulation | Very High | Medium |
| Spray Foam | Excellent | High |
Knowing about different insulation types and their benefits helps you choose the right one for your soundproofing needs.
Managing Ventilation
When building a soundproof booth, it’s important to manage ventilation well. This keeps the air fresh and the temperature stable. Good ventilation stops stale air from building up.
Importance of Airflow
Airflow is key for removing stale air and bringing in fresh air. Without it, the air can become stale and uncomfortable. This can ruin the quality of recordings or make the booth hard to use. Good airflow also cuts down humidity and stops mold and mildew from growing, making the booth healthier for users.
Creating Whisper-Quiet Vents
To keep the booth soundproof while still having good ventilation, you need to make quiet vents. This can be done by using sound-absorbing materials in the vents. Here are some ways to do it:
- Use acoustic foam or sound-absorbing panels in the ducts.
- Put in silencer ducts that cut down on noise.
- Make sure vents have bends to soak up sound.
Using Fans Within Your Booth
Fans can help move air around in the booth, improving ventilation. But, you need to pick quiet fans or use silent operation fans. Here are some tips for using fans well:
- Place fans to move air well without making noise.
- Use fans with adjustable speeds to keep noise down during recordings.
- Keep fans in good shape to ensure they stay quiet and work well.
By using these strategies for ventilation, you can make a soundproof booth that works well and is comfortable to use for a long time.
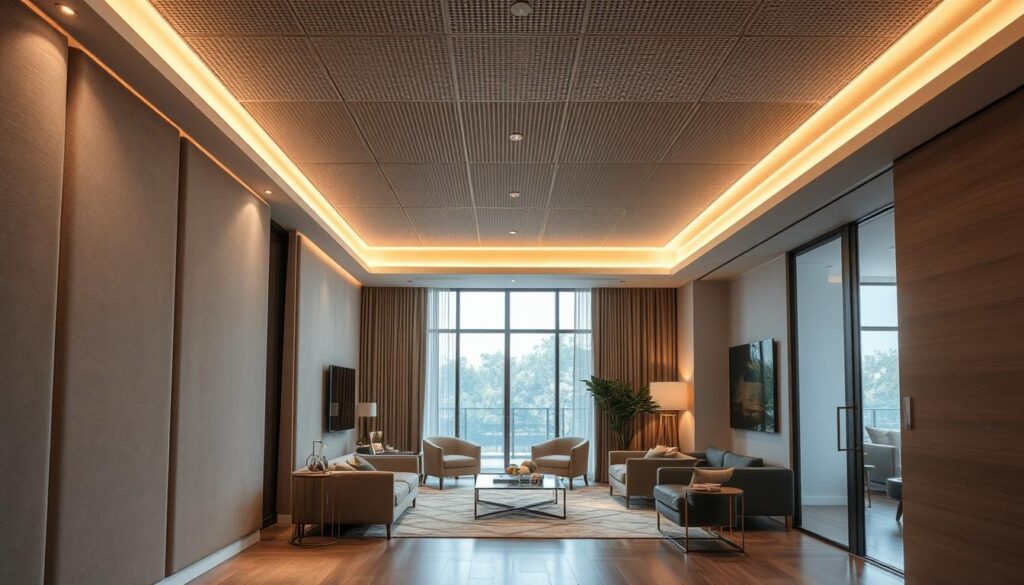
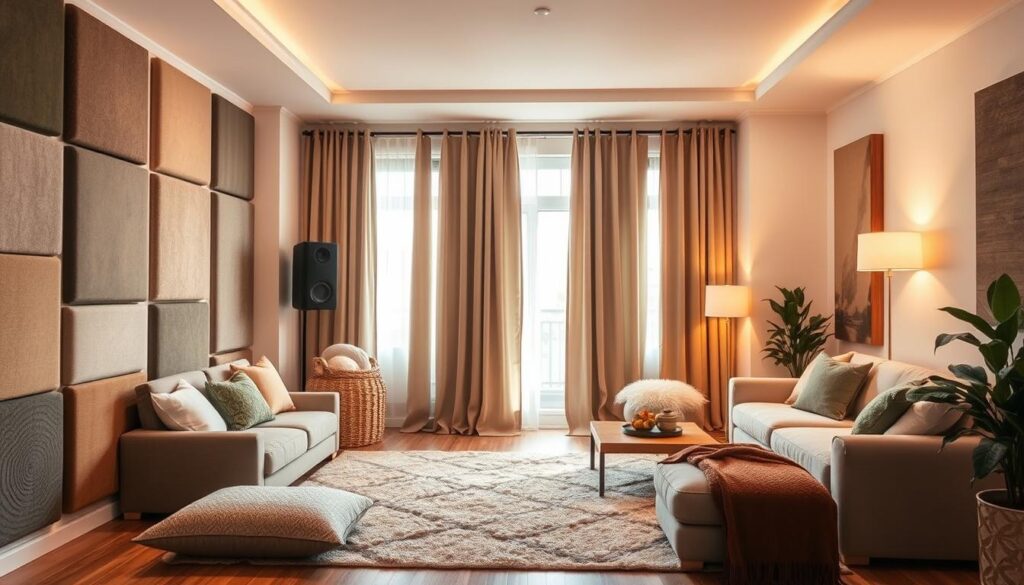
Finishing Touches: Interior Design
Now that your soundproof booth’s structure is set, it’s time to add the finishing touches. The interior design is key to making your booth both comfortable and functional.
Think about what you want your booth to be like. Is it for recording, studying, or just relaxing? Your booth’s design should match its purpose.
Choosing Suitable Furnishings
Choosing the right furniture is crucial. Pick pieces that fit your booth’s purpose. For recording, a comfy chair and a desk for your gear are must-haves.
- Opt for furniture that’s compact and doesn’t mess with the booth’s soundproofing.
- Go for ergonomic options to ensure you stay comfy for long periods.
- Choose materials that are easy to clean and keep up.
Using Carpet or Rugs
Carpet or rugs can really improve your booth’s interior. They add warmth and comfort, and help with sound absorption too. This reduces echo and reverberation.
| Material | Sound Absorption | Aesthetic Appeal |
|---|---|---|
| Carpet | High | Moderate |
| Rugs | Moderate to High | High |
Incorporating Lighting
Lighting is vital for your booth’s design. Good lighting makes the space feel welcoming and reduces eye strain. You can use LED strips or overhead lights.
Think about the color and brightness of your lights. They should be comfortable for those using the booth. Also, consider lights that can be dimmed for extra flexibility.
By focusing on these design elements, you’ll create a booth that blocks out noise and is also cozy and inviting. Whether you’re looking for soundproof booth project ideas or tips on acoustic treatment for DIY booth, the right finishing touches will make a big difference.
Testing Your Soundproof Booth
Building a soundproof recording booth is a big job. Testing it is just as important. It makes sure your booth works well and keeps sound out. Testing helps find any weak spots that need fixing.
Common Testing Methods
There are a few ways to check if your booth is soundproof. You can play music or white noise inside and listen outside. Or, use sound level meters to measure decibel levels. Another way is to record audio inside and see if you can hear outside noise.
Testing with Sound Level Meters: Sound level meters give you exact numbers. They show how well your booth blocks sound by comparing inside and outside decibel levels.
| Testing Method | Description | Effectiveness |
|---|---|---|
| Sound Level Meters | Measure decibel levels inside and outside the booth | High |
| Audio Recording | Record audio inside the booth to check for external noise | Medium |
| Sound Leakage Observation | Play music or white noise inside and observe sound leakage | Low |
Making Adjustments Based on Results
After testing, look at your results to see what needs work. If you hear a lot of sound coming in, add more soundproofing or seal gaps. Changing the booth’s layout or adding mass to walls can also help.
Iterative Testing: Testing and tweaking your booth is a cycle. You might need to make several changes and test again to get it right.
By testing and adjusting, you can make sure your booth works well. Good soundproofing is key for clear recordings and less outside noise.
Maintenance Tips for Your Soundproof Booth
To keep your soundproof booth working well, regular maintenance is key. This means checking for damage, cleaning acoustic panels, and updating materials when needed. By doing these steps, your booth will keep providing top-notch soundproofing.
Regular Checks
Check your booth often for signs of wear and tear. Look at the frame, panels, and insulation for any damage or wear. Use a hammer tacker stapler to fix any loose fiberglass insulation, keeping your booth soundproof.
Cleaning and Updates
Clean your acoustic panels softly with a brush or vacuum to get rid of dust and dirt. You might need to update your soundproofing materials over time. This could mean replacing old insulation or adding new panels to boost your booth’s sound quality.
By keeping your soundproof booth in good shape, you’ll enjoy its benefits for a long time. Knowing how to make a soundproof booth is important. But, it’s just as crucial to maintain it well.