Did you know nearly 30% of a home’s energy loss comes from poorly sealed spaces? Improving your living areas doesn’t require professional help or a hefty budget. With straightforward methods like cutting materials to size and securing them in place, you can boost your property’s efficiency in just a few hours.
This guide focuses on affordable solutions that even first-timers can handle. For example, upgrading a 12×20 ft. room typically costs between $0.30 and $4 per square foot and takes 2-4 hours. You’ll reduce drafts, stabilize indoor temperatures, and see a noticeable drop in heating and cooling bills.
Beyond energy savings, these upgrades help manage moisture and reduce outside noise. The process is designed for clarity: measure your space, fit the materials snugly, and fasten them securely. Real-world tests confirm these steps work for various home layouts.
Ready to make your space cozier while keeping expenses low? Let’s walk through practical, time-tested strategies that balance simplicity and long-term results.
Introduction to Effective Wall Insulation
Sealing your living spaces properly does more than lower utility bills—it transforms how your home feels year-round. The EPA estimates households can save 15% on heating and cooling costs by addressing hidden gaps behind drywall and around windows doors. This creates a ripple effect: fewer drafts, steadier temperatures, and cleaner air.
Why Prioritize This Upgrade?
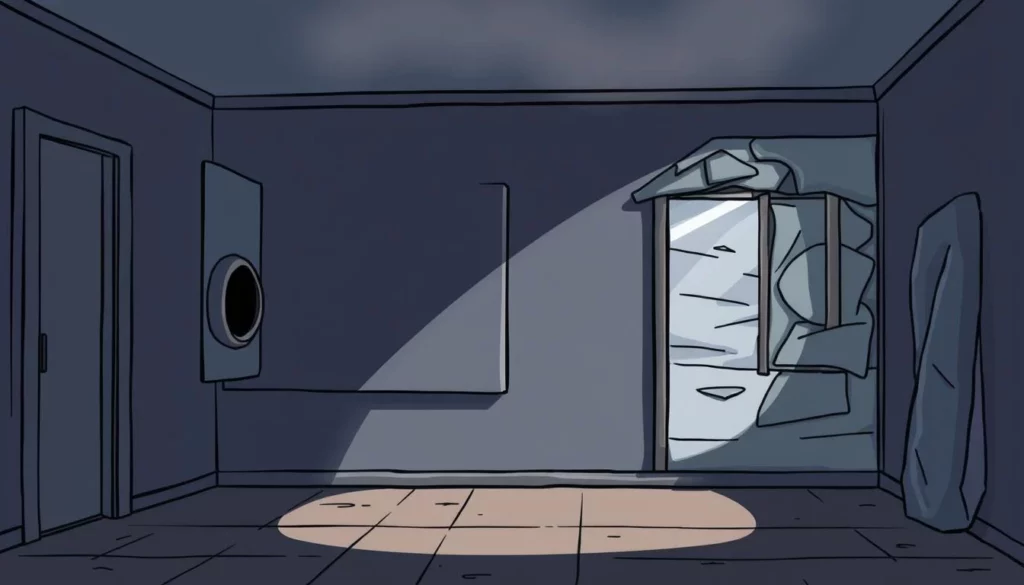
Uninsulated spaces act like energy sieves. Warm air escapes in winter, while summer heat seeps through cracks. Proper materials in key areas block this transfer, keeping conditioned air where it belongs. You’ll also reduce condensation that leads to mold—a common issue in humid climates.
Sustained Comfort and Protection
Beyond savings, insulation muffles street noise and creates consistent room temperatures. For example, homes near busy roads notice quieter interiors within days of installation. Always check local building codes before starting—some regions require specific fire-rated materials you’ll need to source.
Choosing quality products ensures durability. Fiberglass batts or spray foam last decades when installed correctly. Remember: understanding your home’s unique needs is the foundation for lasting results.
Understanding the Basics of Home Insulation
Why do some rooms feel drafty even after adding insulation? The answer often lies in material choices and overlooked physics. Three factors determine success: thermal resistance, airtight barriers, and precise installation.
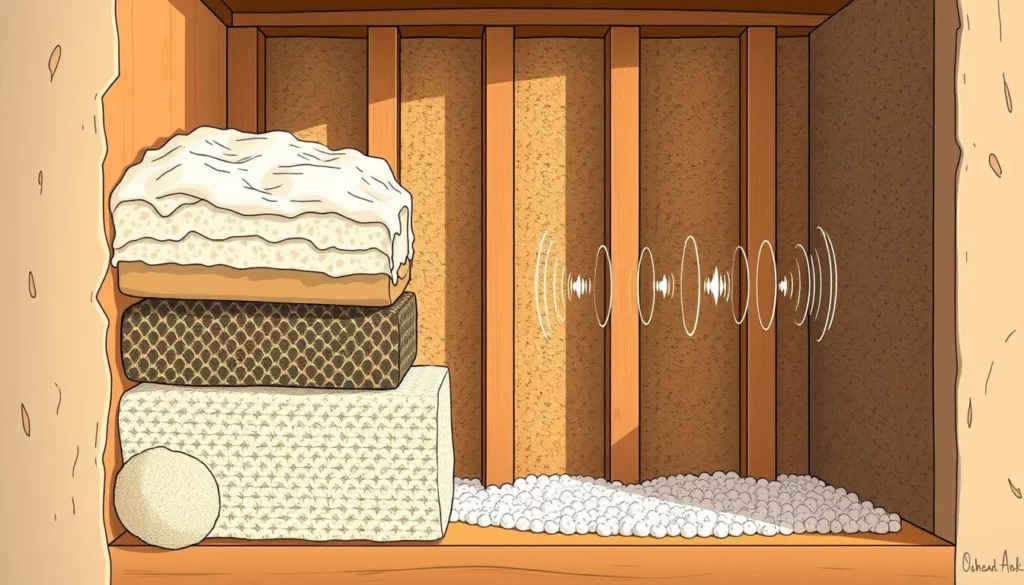
Insulation Materials Explained
Fiberglass batts remain popular for their affordability and ease of handling. These pre-cut panels fit snugly between wall studs when sized correctly. Spray foam expands to fill irregular cavities, while cellulose—made from recycled paper—blocks airflow effectively in attics. Expert Tom Silva advises: “Match batt thickness to your stud depth. A 3.5-inch gap needs R-13 fiberglass insulation.”
Key Concepts: R-Value and Air Sealing
R-value measures a material’s heat resistance. Higher numbers mean better performance. For example, fiberglass batts range from R-11 to R-38. But even high R-values fail if air leaks through gaps. Sealing cracks around outlets or windows prevents warm air from escaping—critical for energy efficiency.
Faced batts have vapor barriers to control moisture; unfaced types work best when adding layers. A 1/8-inch gap in installation can reduce effectiveness by 25%. Measure twice, cut once—your utility bills depend on it.
DIY Wall Insulation Techniques for Successful Home Projects
Taking control of your home’s energy efficiency starts with smart material choices. With the right approach, you can save up to 40% on annual heating costs while tailoring solutions to your property’s unique layout. Let’s explore how hands-on methods create lasting value.
Advantages of DIY Installation
Completing this project yourself cuts labor expenses by 50-70%. For example, insulating a 12×12 ft. room with fiberglass batts costs $120-$180 and takes 3 hours—versus $400+ for professional services. You’ll also adapt materials to tricky spaces like angled ceilings or uneven stud bays that contractors might overlook.
Comparing Popular Insulation Options
Each material excels in specific scenarios. Spray foam insulation creates an airtight seal but requires precise application. Traditional batts are budget-friendly yet struggle with irregular gaps. Here’s how top choices stack up:
| Type | Cost per Sq.Ft. | Installation Time | Best For |
|---|---|---|---|
| Spray Foam | $1.50-$3.50 | 2-4 hours | Sealing air leaks |
| Fiberglass Batts | $0.30-$1.20 | 1-2 hours | Standard wall cavities |
| Cellulose | $0.80-$1.50 | 3-5 hours | Attics & soundproofing |
Spray foam outperforms others in air sealing—expanding 30x its liquid size to block drafts. However, fiberglass works better for quick fixes. For detailed guidance, consult this step-by-step guide to match products with your building’s needs.
Exploring Different Insulation Materials
Your choice of insulation materials shapes your home’s comfort and energy bills more than you might realize. Each option offers unique strengths for specific scenarios—from standard stud bays to tricky corners needing airtight seals.

Fiberglass Batts: Flexible and Familiar
Fiberglass insulation remains a top pick for its affordability and ease of installation. Pre-cut batts fit snugly between 2×4 walls (3½ inches deep) when measured accurately. Faced versions include a vapor barrier—ideal for exterior walls in humid climates. Unfaced batts work better when adding layers or insulating interior spaces.
Home improvement expert Tom Silva notes: “For irregular stud spacing, trim batts ½ inch wider than the cavity. This ensures a friction fit without compressing the material.” Compression reduces effectiveness by up to 25%.
Spray Foam vs. Cellulose: Modern Alternatives
Foam insulation expands to seal every crack, making it perfect for drafty attics or around wiring. Though pricier upfront, it prevents 40% more air leakage than batts. Cellulose—made from recycled paper—excels in eco-friendly projects. Blown into wall cavities, it dampens noise while blocking heat transfer.
| Material | Cost per Sq.Ft. | R-Value | Best Use |
|---|---|---|---|
| Fiberglass Batts | $0.30-$1.20 | R-13 | Standard walls |
| Spray Foam | $1.50-$3.50 | R-6.5 per inch | Air leak sealing |
| Cellulose | $0.80-$1.50 | R-3.8 per inch | Eco-friendly upgrades |
Rigid foam boards work well for basement walls or exterior sheathing. Their high R-value (up to R-10 per inch) suits spaces needing slim profiles. For most homes, combining materials delivers optimal results—like using batts in walls and spray foam around windows.
Choose fiberglass for budget-friendly simplicity, foam for airtight performance, or cellulose for sustainable soundproofing. Your home’s layout and priorities will guide the best fit.
Resources & Tools You Need for Installation
Proper preparation separates successful projects from frustrating ones. Having the right equipment ensures smooth progress while protecting your health and materials. Let’s break down what you’ll need to work efficiently and avoid common setbacks.
Essential Tools and Safety Gear
Start with these non-negotiables:
- Precision tools: Utility knife, tape measure, and staple gun for accurate cuts and secure placement
- Safety essentials: Gloves prevent skin irritation, while safety glasses shield eyes from airborne particles
- Respiratory protection: N95 masks or respirators filter harmful fibers during cutting or handling
Additional Materials and Utility Supplies
Complete your setup with these items:
- High-quality caulk and foam sealants for gaps around outlets or floor joints
- Heavy-duty staples or insulation hangers to keep materials in place
- Work lights and drop cloths for visibility and easy cleanup
Store batts or rolls flat to maintain their R-value. Compressed materials lose effectiveness—keep them dry and away from direct sunlight. Always review local guidelines for attic projects, as some areas require fire-resistant barriers.
With these tools and precautions, you’ll handle any space confidently—from tight corners to high-traffic areas. Precision now means fewer adjustments later.
Preparing Your Workspace and Measuring Accurately
Accurate measurements form the backbone of any successful insulation project. Before cutting materials, assess your workspace for obstructions like plumbing or electrical lines. Use a stud finder to map vertical supports—most walls have 16-inch or 24-inch spacing between studs.
Assessing Wall Dimensions and Stud Spacing
Measure each cavity’s height and width twice to confirm consistency. Irregular gaps between studs require custom-cut batts or spray foam for complete coverage. For 2×4 walls, subtract ½ inch from cavity width to ensure insulation fits snugly without compression.
| Tool | Purpose | Pro Tip |
|---|---|---|
| Laser Measure | Precision sizing | Use for high ceilings |
| Stud Finder | Locate supports | Check calibration first |
| Notepad | Record dimensions | Sketch problem areas |
Pre-Installation Checks and Local Building Codes
Review regional requirements for insulation R-values and fire safety. Coastal areas often mandate moisture-resistant faced batts, while attics may need specific vapor barriers. Seal air leaks around outlets with foam sealant before installing materials—this prevents drafts that undermine efficiency.
Mark measurement lines with bright chalk for visibility. Always wear protective gear like gloves and goggles when handling fiberglass or spray foam. Tight cavities near pipes? Use expanding foam to fill gaps traditional batts can’t reach.
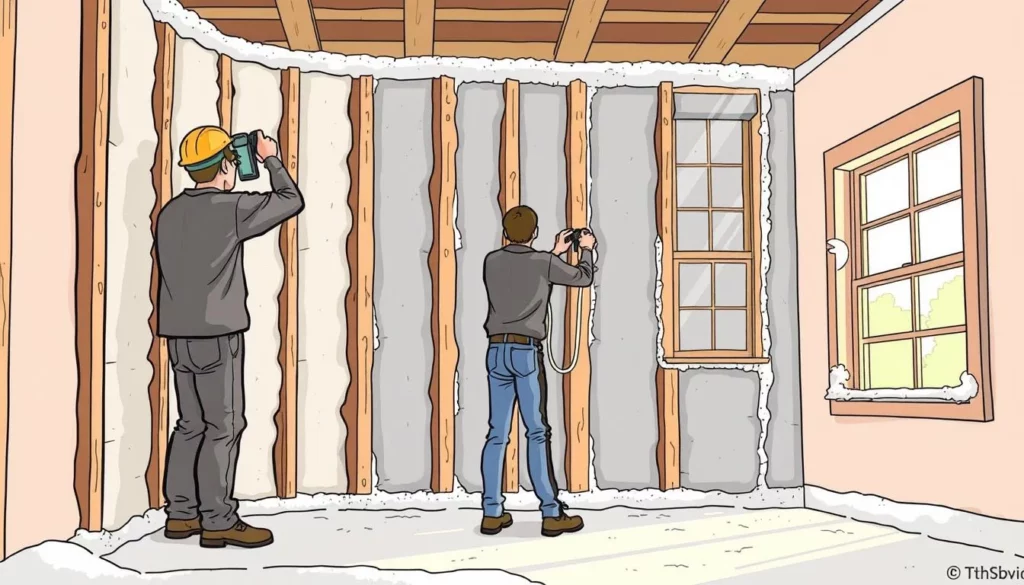
Step-by-Step Guide to Installing Insulation
Properly installed insulation can slash energy bills by up to 20% annually while enhancing indoor comfort. Start by gathering tools like a utility knife, measuring tape, and heavy-duty staples. Work in well-lit areas to spot gaps around windows doors or utility lines that need attention.
Cutting, Fitting, and Securing the Insulation
Measure each cavity’s height and width, adding ½ inch to ensure a snug fit. Lay rigid foam or batts on a flat surface, using a 2×4 as a straight-edge guide for clean cuts. Press the utility knife firmly along the marked line—multiple shallow passes prevent jagged edges.
Tuck materials between studs without compressing them. For wiring or pipes, slice the insulation vertically and wrap it around obstructions. Secure edges every 8 inches with staples or adhesive, ensuring no sagging occurs. Apply caulk along seams to block airflow and maintain thermal resistance.
Adding Vapor Barriers and Sealing Gaps
Install vapor barriers on the interior side of exterior walls to prevent condensation. Overlap sheets by 6 inches and seal joints with foil tape. Pay special attention to attic spaces and basements, where moisture buildup is common.
Use expanding spray foam around window frames and electrical outlets. For larger gaps, cut foam board to size and secure it with construction adhesive. This dual approach preserves R-value while creating an airtight envelope.
| Sealing Material | Best Use | Drying Time |
|---|---|---|
| Acrylic Caulk | Small gaps ( | 1-2 hours |
| Spray Foam | Irregular cavities | 8 hours |
| Foil Tape | Vapor barrier seams | Instant |
Tips for Overcoming Common Installation Challenges
Even the best plans hit snags—here’s how to tackle them. Professional installers face similar problems daily, from uneven gaps to stubborn drafts. These solutions keep your project moving smoothly while protecting your home’s efficiency.
Dealing with Irregular Stud Spacing and Air Leaks
Measure each cavity carefully if studs aren’t standard 16-inch spacing. Cut batts ½ inch wider than the gap for a snug friction fit. For odd-shaped areas, spray foam fills gaps better than rigid materials. Seal around pipes and wires with acrylic caulk before adding insulation.
Air leaks often hide behind outlets or along baseboards. Apply expanding foam in thin layers—it grows 30x its size. For tight spots, a sharp utility knife creates clean edges on batts without tearing fiberglass.
Handling Moisture Issues and Material Compression
Never compress batts into narrow spaces—this slashes their R-value by 25%. Instead, trim materials precisely or use thinner foam boards. In damp areas like basements, install faced batts with vapor barriers facing inward.
Check for condensation-prone zones near windows. Leave 1-inch gaps around recessed lights to prevent overheating. If existing insulation feels damp, replace it immediately to avoid mold. Proper ventilation matters more than you think—install soffit vents if attic foam traps humidity.
Safety Guidelines and Best Practices for DIY Projects
Prioritizing safety ensures your home upgrades protect both your family and your investment. Proper precautions prevent injuries and maintain material effectiveness, especially when handling fibrous or chemical-based products.
Essential Protective Equipment and Protocols
Always wear gloves, safety glasses, and an N95 respirator when cutting materials. Fiberglass particles and spray foam fumes irritate skin and lungs—proper gear reduces exposure by 90%.
| Protection Type | Purpose | Critical For |
|---|---|---|
| Cut-Resistant Gloves | Prevent fiberglass splinters | Batts handling |
| Ventilated Mask | Filter airborne particles | Spray foam application |
| Knee Pads | Reduce strain during floor work | Basement projects |
Keep your workspace clutter-free to avoid tripping hazards. Secure ladders firmly when accessing high areas near studs or plumbing. Open windows or use fans to circulate air—chemical off-gassing from foam requires 8 hours of ventilation.
Inspect electrical outlets and wiring before installation. Use non-conductive tools near live circuits to prevent shocks. Store materials away from heat sources to reduce fire risks.
Follow local building codes for vapor barriers and clearance around recessed lights. Take 10-minute breaks hourly to stay alert—fatigue causes 27% of DIY accidents.
Conclusion
Upgrading your home’s thermal protection delivers immediate rewards and lasting value. Studies from the U.S. EPA show proper sealing cuts energy bills by 15% annually while stabilizing indoor temperatures. You’ve learned how precise measurements, material choices like foam or fiberglass, and attention to cavities ensure maximum efficiency.
Following safety protocols prevents risks like fire hazards or moisture buildup. Periodic checks in your attic or around windows maintain performance over time. Remember: even small gaps waste utility costs and comfort.
This project strengthens your home’s value and your confidence. With the right tools and time, you’ll create a healthier, quieter living space. Start today—your energy-efficient haven awaits.