Are you tired of the constant noise in your home? Soundproofing your floors can greatly reduce the disturbance. It can also improve your overall quality of life.
Simple and effective methods can help minimize floor noise. Adding rugs and curtains can absorb sound. Rearranging your furniture can also make a big difference.
By using these DIY soundproofing methods, you can make your living space quieter. This article will show you practical and effective ways to quiet your space.
Understanding Soundproofing Basics
To soundproof your space well, you need to know the basics. Soundproofing makes areas quieter by blocking sound from moving between them. This creates a more peaceful place.
What is Soundproofing?
Soundproofing uses materials and methods to block sound through walls, floors, and ceilings. It works by adding mass, damping, decoupling, and filling gaps. Adding mass uses heavy stuff to soak up sound. Damping turns sound into heat, making it less loud. Decoupling keeps surfaces apart to stop sound from passing through. Filling gaps closes any openings for sound to get in or out.
Common Sources of Noise
Noise can come from many places, like footsteps, voices, traffic, and appliances. In buildings with many floors, the sound of footsteps on hard floors is often a problem. Knowing where noise comes from helps pick the best ways to soundproof your floors.
- Footsteps and movement
- Voices and conversations
- Traffic and external noise
- Household appliances and music
Why Soundproof Your Floors?
Soundproofing floors is key to cutting down on noise and making life better. It helps reduce the sound of footsteps and other noises. This makes your living or work space more comfortable. It also helps keep your space private and quiet, which is important for both homes and offices.
Using the right materials and methods for floor soundproofing can really lower noise levels. Learning about soundproofing basics and using the right techniques can make your space quieter and more peaceful.
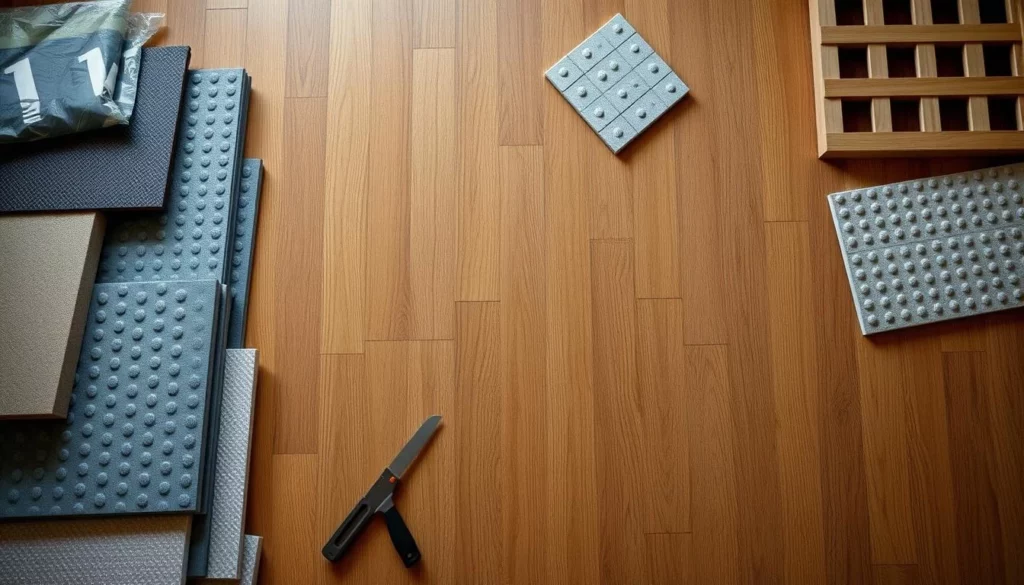
Materials for Soundproofing Floors
To soundproof your floors well, you need to pick from special materials. The right ones can cut down noise, making places quieter. For tips on making workspaces better, check out Soundproof Spaces on soundproofing walls.
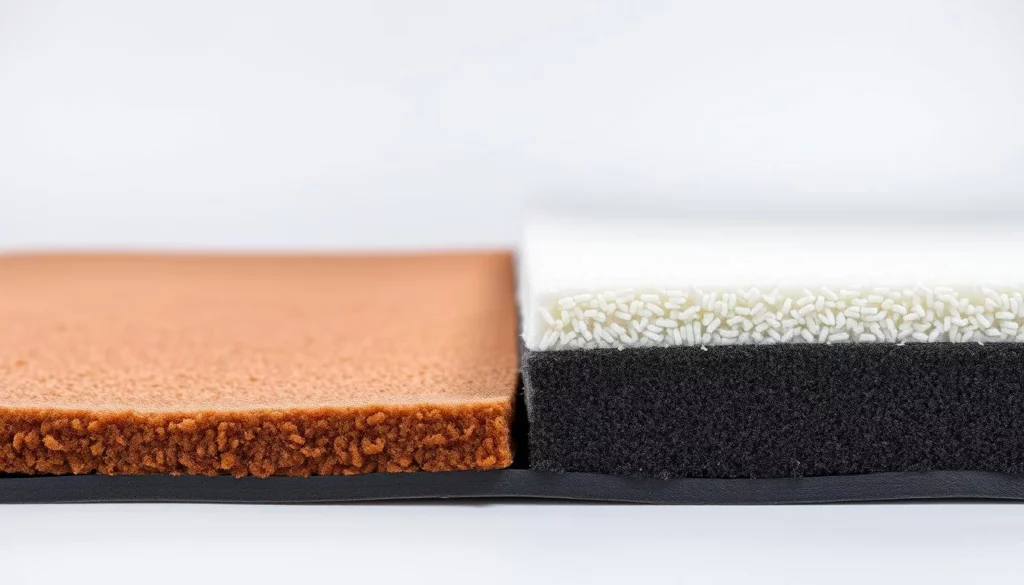
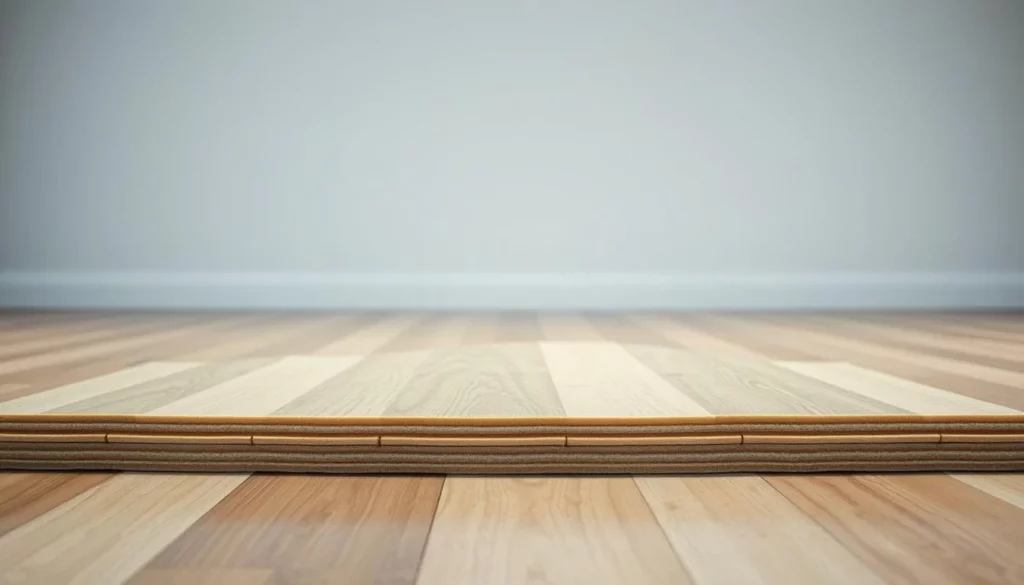
Acoustic Underlayments
Acoustic underlayments are key for soundproofing floors. They go between the subfloor and your flooring, like hardwood or laminate. These underlayments soak up sound, lessening floor noise.
Benefits of Acoustic Underlayments:
- Reduces impact noise
- Easy to install
- Works with many flooring types
Soundproof Mats and Carpets
Soundproof mats and carpets also help quiet down noise. Mats are made of dense materials that soak up sound. Carpets add more sound absorption because of their thickness and density.
Advantages of Soundproof Mats and Carpets:
| Material | Sound Absorption | Installation Ease |
|---|---|---|
| Soundproof Mats | High | Easy |
| Thick Carpets | Medium to High | Moderate |
Insulating Foam and Boards
Insulating foam and boards are also good for soundproofing floors. They keep warmth in and block noise. They go under the subfloor or between floor joists.
Benefits of Insulating Foam and Boards:
- Blocks both impact and airborne noise
- Keeps warmth in
- Works in many building setups
Choosing the right materials for soundproofing floors can greatly improve your space’s sound quality. Whether you pick acoustic underlayments, soundproof mats and carpets, or insulating foam and boards, each has its own benefits for a quieter space.
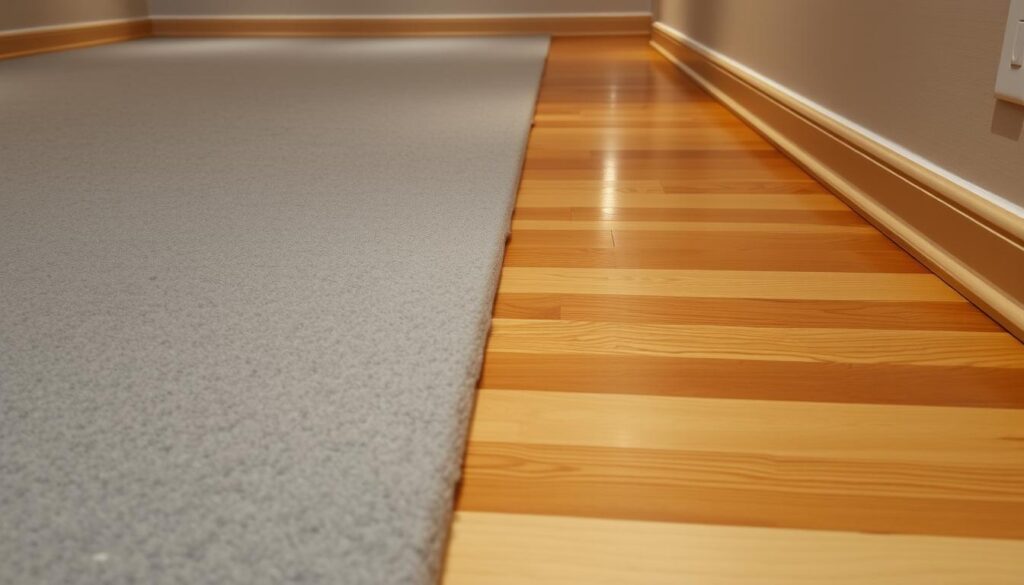
Preparing Your Floor for Soundproofing
Getting your floor ready is the first step in soundproofing. A well-prepared floor is essential for effective soundproofing.
Assessing Your Floor Type
Start by figuring out what kind of floor you have. Different floors need different soundproofing methods. For example, hardwood floors need special care, while concrete floors might have cracks.
Knowing your floor type helps you choose the right soundproofing materials and methods. Whether it’s wood, concrete, or laminate, each floor has its own soundproofing needs.
Cleaning and Clearing the Space
After figuring out your floor, clean and clear the area. Take out furniture, rugs, and anything else that might get in the way. Make sure to sweep and clean the floor well to remove dirt and dust.
A clean space makes soundproofing easier and helps materials stick better. This improves how well they work.
Measuring and Planning Your Project
Next, measure your floor accurately to figure out how much material you need. Make a detailed plan for your project, including what materials and tools you’ll use.
Measuring and planning are important to avoid wasting materials and to work efficiently. Think about the room’s size, the materials you’re using, and any challenges you might face.
By following these steps, you’ll be ready to start your soundproofing project. Proper preparation is crucial for effective soundproofing. With the right steps, you can greatly reduce noise and make your space more comfortable.
Adding Rugs and Carpets
Using rugs and carpets for DIY floor soundproofing is easy and works well. They make your rooms look good and help lower noise levels.
Benefits of Thick Rugs
Thick rugs are great at soaking up sound. The thicker the rug, the more sound it can block. Thick rugs can cut down on footstep noise and other impact sounds, making your home quieter.

Layering Techniques
Stacking rugs and carpets boosts their soundproofing power. Putting a rug over another or underlayment makes a strong barrier against noise. This method works well in busy areas or rooms with hard floors.
Choosing the Right Material
The type of rug or carpet matters for soundproofing. Natural fibers like wool are top-notch for sound absorption. Synthetic materials can also work well, depending on their density and thickness. Think about how durable and easy to clean the material is too.
| Material | Sound Absorption | Durability |
|---|---|---|
| Wool | High | High |
| Synthetic | Medium to High | Medium to High |
| Jute | Medium | Low to Medium |
Knowing the pros and cons of different rugs and carpets helps you choose better for your home’s soundproofing.
Soundproofing with Mass Loaded Vinyl (MLV)
Mass Loaded Vinyl (MLV) is a top pick for soundproofing floors. It’s great at cutting down on noise from footsteps and other sounds. Adding MLV to your soundproofing plan can really help.
What Is Mass Loaded Vinyl?
Mass Loaded Vinyl is a thin, flexible sheet made of vinyl and heavy metal particles. It’s usually barium sulfate or lead. This mix makes MLV heavy, which is key for soundproofing.
By adding mass to your floors, you can block sound waves better. This makes your living or working space quieter. For more on MLV, check out The Complete Guide to Mass Loaded.
Installation Process
Putting in Mass Loaded Vinyl is easy, making it a good DIY project. Here’s how to do it:
- Measure your floor to figure out how much MLV you need.
- Cut the MLV to fit using a utility knife or scissors.
- Put the MLV under your flooring, making sure it covers the whole floor.
- Use an adhesive to hold the MLV in place, if needed.
Always follow the maker’s instructions for the best installation. Different products might have special needs.
Benefits of MLV
Using Mass Loaded Vinyl for soundproofing has many advantages:
- Effective Noise Reduction: MLV works well against airborne and impact noise.
- Flexibility: Despite being heavy, MLV bends easily and fits under many floorings.
- Easy to Install: MLV is simple to put in, even for those doing it themselves.
Adding Mass Loaded Vinyl to your soundproofing plan makes your space much quieter. It’s perfect for homes, recording studios, or anywhere you want less noise.
Using Acoustic Matting
Looking for a budget-friendly way to soundproof your floors? Acoustic matting is a great choice. It works well under different floor types like hardwood, laminate, and tile.
Types of Acoustic Matting
There are many types of acoustic matting, each with its own perks. Here are a few:
- Rubber acoustic matting: It’s tough and won’t get damaged by moisture.
- Recycled materials matting: It’s good for the planet and made from recycled stuff.
- Cork acoustic matting: It’s natural, soft, and helps block sound.
Installing Acoustic Mats
Putting in acoustic mats is easy. Just follow these steps:
- Clean your subfloor well.
- Measure and cut the mat to fit your space.
- Place the mat over your floor, making sure it covers everything.
- Put your flooring on top of the mat.
Combining with Other Techniques
Want even better soundproofing? Mix acoustic matting with other methods. Here are some good pairs:
| Technique | Benefit |
|---|---|
| Mass Loaded Vinyl (MLV) | It adds weight to the floor, which helps block sound. |
| Acoustic Underlayment | It adds extra cushioning and helps absorb sound. |
| Sealing Gaps and Cracks | It stops sound from escaping through small openings. |
By mixing acoustic matting with these methods, you can make your floors even quieter.
Utilizing Green Glue Compound
For those looking to soundproof their floors on their own, Green Glue is a great option. It helps reduce noise by dampening vibrations. This makes it perfect for anyone wanting to keep their home quieter.
What Is Green Glue?
Green Glue is a special compound for soundproofing. It’s placed between two layers of material to block noise. It’s safe, non-toxic, and doesn’t catch fire, making it ideal for soundproofing.
Application Process
To use Green Glue, follow these steps:
- Make sure the surface is clean and dry.
- Spread a lot of Green Glue on the surface evenly.
- Put the second layer on top and press hard for good contact.
- Wait for the Green Glue to dry before you do anything else.
Advantages of Chemical Damping
Green Glue has many benefits over other soundproofing methods. Here are a few:
| Advantage | Description |
|---|---|
| Effective Noise Reduction | Green Glue is great at blocking noise, perfect for soundproofing floors. |
| Easy to Apply | It’s simple to use, needing little special gear or skill. |
| Safe and Non-Toxic | Green Glue is safe and non-toxic, great for homes and businesses. |
Using Green Glue can make your floors soundproof. This improves your home’s comfort and peace.
Sealing Gaps and Cracks
Sealing gaps and cracks in your floors is often overlooked. Yet, it’s key to soundproofing. Even the best materials can fail if sound has a path to follow. So, finding and sealing these spots is essential.
Identifying Problem Areas
First, inspect your floors for gaps or cracks. Check around heating vents, electrical outlets, and where the floor meets the wall. Also, look for gaps between floorboards or tiles. Using a flashlight can help illuminate these areas, making them easier to spot.
After finding the problem spots, note their locations and sizes. This helps you plan what materials and methods you’ll use to seal them.
Best Sealants to Use
Choosing the right sealant is crucial for soundproofing. Acoustic caulk is a top pick because it’s made to block noise. Look for products labeled as ‘acoustic’ or ‘soundproofing’ caulk, as they’re designed to dampen sound.
For bigger gaps, spray foam is a good option. For areas that move or vibrate, silicone-based sealants work well. Pick a sealant that fits the area’s needs.
Techniques for Effective Sealing
To seal gaps and cracks well, clean the area first. Then, apply the sealant as the manufacturer says. For big gaps, use a backer rod to fill the space before sealing.
Make sure the sealant is pressed firmly into the gap to work best. For areas around electrical outlets or switches, use soundproofing pads or covers.
By sealing gaps and cracks, you can greatly improve your floor’s soundproofing. This step, along with other methods, will make your space quieter and more peaceful.
Soundproofing for Existing Structures
Many homeowners and renters face noise issues. Soundproofing existing floors is a practical solution. It works for both older homes and apartments.
Options for Older Homes
Older homes can be tricky to soundproof. But, there are effective strategies to reduce noise.
- Check your floors’ condition to find the best method.
- Use acoustic underlayments or soundproof mats under your flooring.
- Consider installing Mass Loaded Vinyl (MLV) for extra soundproofing.
Solutions for Apartments
Apartments need soundproofing that’s effective yet doesn’t damage the space. Here are some options:
- Use area rugs and thick carpets to absorb sound.
- Apply acoustic caulk to seal gaps around your flooring.
- Install soundproofing panels or mats under your flooring.
Temporary vs. Permanent Fixes
You can choose between temporary and permanent soundproofing solutions. Temporary fixes, like rugs or portable panels, work short-term. Permanent solutions, like MLV or underlayments, offer long-term benefits.
| Solution Type | Temporary | Permanent | |
|---|---|---|---|
| Area Rugs/Carpets | Yes | No | Effective for immediate noise reduction. |
| Mass Loaded Vinyl (MLV) | No | Yes | Provides significant long-term soundproofing. |
| Acoustic Underlayments | No | Yes | Offers durable soundproofing under various flooring types. |
Choosing the right soundproofing solution depends on your needs. Whether you need a quick fix or a long-term solution, understanding your options helps. This way, you can pick what fits your lifestyle and budget.
Maintenance of Soundproofing Solutions
Soundproofing isn’t just a one-time job. It needs ongoing care to keep working well. Regular checks and upkeep help your soundproofing stay effective.
Regular Checks
It’s important to check your soundproofing often. Look for any wear and tear signs. This includes cracks in sealants or damage to materials.
- Inspect sealants and caulk for any signs of deterioration.
- Check soundproofing mats and underlayments for damage or displacement.
- Verify that all soundproofing materials are securely in place.
Effective Cleaning
Cleaning your soundproofing right is key. Each material needs a specific cleaning method. It’s important to use the right way to clean.
For soundproof mats and underlayments, a vacuum or damp cloth works well. Stay away from harsh chemicals that could harm them.
For sealed gaps and cracks, clean gently. Use a soft brush or dry cloth to remove dust and dirt.
Upgrading Your Materials
Soundproofing materials may need updates or replacements over time. Keep an eye out for new, better materials to upgrade to.
By keeping up with maintenance, you can have a quieter space. Regular checks, proper cleaning, and timely upgrades are essential for effective soundproofing.
Evaluating Effectiveness of Soundproofing
After you’ve set up your DIY floor soundproofing, it’s important to check how well it works. This step makes sure your space is quieter and more comfortable.
Sound Level Testing
Testing sound levels is a simple way to see if your soundproofing is working. You can use sound level meters or apps to measure decibel levels before and after. This helps you find areas that need more work for better soundproofing.
Making Adjustments
If your first soundproofing steps don’t work as well as you hoped, it’s time to make changes. You might need to add more mass loaded vinyl, seal gaps, or layer rugs and carpets. Regular checks help you improve your soundproofing plan.
Long-term Success Strategies
To keep your soundproofing effective, regular checks and upkeep are essential. Look for wear on soundproofing materials and seal new gaps quickly. These long-term steps help you enjoy your DIY soundproofing for many years.