Feeling drafts around your windows and seeing your energy bills go up? Sealing your windows is a simple way to make your home more energy-efficient. It also helps lower your utility costs.
Windows are often the biggest problem in a home’s energy efficiency. They let cold air in and warm air out. Using the right caulking techniques can stop these air leaks. This makes your home more comfortable.
Learning how to seal windows right can save you money on energy bills. It also helps the environment.
Understanding Window Sealing and Caulking
Home maintenance often overlooks window sealing and caulking, yet they’re key for comfort. You might wonder what window sealing is and why it matters. It’s about making your windows airtight to stop leaks and moisture.
Proper window sealing boosts comfort, energy efficiency, and protects against water damage. Learning about window sealing and caulking is a great first step for a secure, efficient home.
What Is Window Sealing?
Window sealing means applying a sealant around your windows to block air, water, and moisture. It’s essential for your windows’ integrity and your home’s energy efficiency. Sealing your windows well stops drafts, saves heat in winter, and keeps your home cool in summer.
The Importance of Proper Caulking
Caulking is a key part of window sealing. It uses caulk around your windows’ edges. Proper caulking seals your windows well, stopping leaks and moisture. This boosts energy efficiency, reduces noise, and prevents water damage.
Common Types of Caulking Materials
There are many caulking materials, each with its own uses. Here are a few common ones:
| Type of Caulk | Characteristics | Best Use |
|---|---|---|
| Acrylic Latex | Easy to clean up, paintable | Interior applications, small gaps |
| Siliconized Latex | More durable than acrylic latex, flexible | Exterior and interior applications, joints that experience some movement |
| Silicone | Highly durable, resistant to extreme temperatures | Exterior applications, areas exposed to heavy weather conditions |
Knowing about different caulking materials helps you choose the right one for your windows. Whether you need a simple DIY fix or a durable seal, there’s a material for you.
Benefits of Effective Window Sealing
Proper window sealing brings many benefits. It saves energy and reduces noise. This makes your home more comfortable and cheaper to live in.
Energy Efficiency and Cost Savings
Sealing your windows well helps your home use less energy. This means you won’t lose heated or cooled air. You’ll save money on your energy bills.
The U.S. Department of Energy says sealing windows and doors can save up to $300 a year. Weatherproofing your windows keeps your home at a steady temperature. This eases the work on your heating and cooling systems.
Reducing Noise Pollution
Sealing your windows also cuts down on outside noise. If your windows aren’t sealed, outside sounds can get in. Using the best sealing products for windows helps keep these noises out. This makes your home quieter and more peaceful.
Preventing Water Damage
Another key benefit is stopping water damage. If your windows aren’t sealed right, water can get in. This harms your walls, floors, and more. Sealing your windows well keeps your home safe from water damage. This saves you from expensive repairs and keeps your home strong.
| Benefits | Description | Impact |
|---|---|---|
| Energy Efficiency | Prevents heated or cooled air from escaping | Cost savings on energy bills |
| Noise Reduction | Minimizes external noise entry | Quieter living environment |
| Water Damage Prevention | Prevents water from seeping into the home | Avoids costly repairs |
Signs Your Windows Need Sealing
Seeing drafts or daylight around your windows means they need sealing. Keeping your windows sealed is key for a cozy and energy-saving home. If you’re having trouble with your windows, look for signs that they need sealing.
Drafts and Cold Spots
Drafts or cold spots near windows are a clear sign they need sealing. Feeling air or noticing a colder area around the window means the seal is broken. Drafts can raise your heating costs and make your home less cozy. To find drafts, try the candle test: hold a lit candle near the window. If the flame wobbles, you have a draft.
Visible Damage or Cracking
Look for damage or cracks on your windows to see if they need sealing. Check the caulking for wear, like cracks or gaps. If you see damage, fix it fast to avoid water damage or pests. Cracks can also mean old caulk needs to be replaced.
High Energy Bills
High energy bills without using more can mean your windows aren’t sealed well. Sealing your windows helps keep heat in winter and out in summer, saving on bills. Fixing gaps or cracks can make your home more energy-efficient.
Tools You’ll Need for Window Sealing
Getting ready for your window sealing project is more than just picking caulk. You need the right tools to start. The right equipment makes the job easier and gives you a professional look.
Essential Tools for the Job
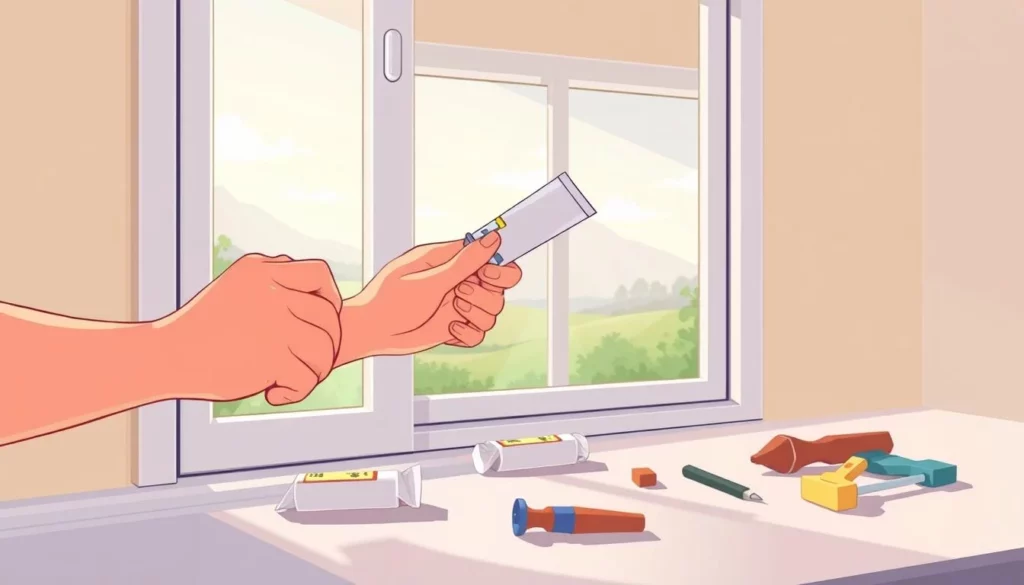
To seal your windows well, you’ll need a few key tools. A caulking gun is the main tool for putting on caulk. You’ll also need a putty knife to take off old caulk and a utility knife to cut the nozzle.
- A caulking gun for smooth, controlled application
- A putty knife for scraping away old caulk and debris
- A utility knife for cutting the nozzle to the right size
- A damp cloth or sponge for cleaning up excess caulk
Safety Gear Recommendations
When working with caulking, safety is key. Wear gloves to keep your hands safe from caulk and chemicals. Safety glasses protect your eyes from splatters. If you’re in a small space, use a dust mask to avoid breathing in fumes.
Choosing the Right Caulking Gun
A good caulking gun is crucial for quality work. Look for one that is durable and has a smooth trigger action. Some guns have a built-in cutter and a ratchet for better caulk flow.
With the right tools and safety gear, you’re ready to confidently tackle your window sealing project.
Types of Caulking Sealants Available
Choosing the right caulking sealant for your windows is key. Different caulking materials have different strengths. They vary in durability, flexibility, and how well they stick to surfaces.
Latex vs. Silicone Caulk
Latex caulk is easy to use and clean up because it dissolves in water. It’s great for inside use and is cheaper than silicone. But, it’s not as tough as silicone, which is better for harsh weather.
Silicone caulk is more durable and flexible. It’s perfect for outside use and places that get wet, like bathrooms. It sticks well to many surfaces but is harder to clean up and remove.
Specialty Caulks for Different Needs
There are caulks made for special needs, like polyurethane caulk. It’s very durable and flexible, great for places that move a lot. It also lasts well outside and can be painted.
For big gaps, use low-expansion foam caulk. It fills gaps and then you can caulk over it for a tight seal. This stops air from getting through.
Comparing Durability and Flexibility
When picking a caulk, think about how long it will last and if it can stretch. A caulk that lasts longer needs less fixing. But, a flexible caulk won’t crack when windows and doors move.
- Durability: Think about weather, UV light, and temperature changes.
- Flexibility: Consider how much the caulk will need to stretch.
- Adhesion: Make sure the caulk sticks well to what you’re sealing.
Knowing about the different caulks and their features helps you choose the best one for your windows.
Step-by-Step Guide to Caulking Windows
Keeping your home draft-free and energy-efficient starts with good window caulking. A few simple steps can seal your windows well. This cuts down on energy costs and makes your home more comfortable.
Preparing the Window Frame
Before caulking, clean the window frame well. Take off dirt, old caulk, or debris with a scraper or damp cloth. Make sure the area is dry before you start.
Tips for Preparation:
- Use a wire brush to remove stubborn dirt or old caulk.
- Apply a caulk remover if necessary to dissolve old caulk.
- Wipe the area with a dry cloth to ensure it’s completely dry.
Applying the Caulk Evenly
To caulk evenly, cut the nozzle at a 45-degree angle. Use a caulking gun to control the flow. Hold the gun at a 45-degree angle to the frame and squeeze out caulk steadily. Move the gun at a consistent pace for an even application.

Finishing Touches for a Professional Look
After caulking, smooth out the bead with a damp finger or caulking tool. This ensures it’s evenly spread and not visible. Remove any excess with a damp cloth. Let the caulk dry as instructed by the manufacturer.
| Caulk Type | Drying Time | Flexibility |
|---|---|---|
| Latex Caulk | 30 minutes to 1 hour | Moderate |
| Silicone Caulk | 1-2 hours | High |
| Polyurethane Caulk | 2-4 hours | High |
By following these steps and tips, you can get a professional-looking finish. Enjoy the benefits of sealed windows, like better energy efficiency and fewer drafts.
Best Practices for Window Sealing
To seal your windows well, follow some key steps. This will help you weatherproof your windows and keep drafts out. It makes your home more comfortable and saves on energy bills.
Timing Your Caulking Project
When to caulk your windows is very important. It’s best to do it when the weather is dry. This stops moisture from messing up the caulking.
Check the weather forecast before you start. Make sure it won’t rain or be too humid while you’re caulking.
Working in Different Weather Conditions
Even if it’s not perfect weather, you can still caulk. If you use silicone-based caulk, a little moisture is okay. But, try to avoid rain or too much humidity.
Latex-based caulks don’t like moisture as much. So, don’t caulk when it’s damp.
Maintaining a Steady Hand
When caulking, keep your hand steady. This makes the caulk go on smoothly. Hold the gun at a 45-degree angle and move it slowly along the joint.
If you’re new to caulking, practice on a small area first. It helps you get the hang of it.
By following these tips, you can seal your windows well. This will help you save on energy bills and make your home more comfortable.
Tips for DIY Window Sealing
Sealing your windows is a simple DIY project. It can lower your energy bills and make your home more comfortable. With the right techniques and knowledge of common mistakes, you can get great results.
Avoiding Common Mistakes
When doing DIY window sealing, it’s key to avoid common mistakes. One big error is not cleaning the surface before applying caulk. Make sure to clean the area well and remove any old caulk or debris.
Choosing the wrong caulk is another mistake. For example, silicone caulk is better than latex because it’s more durable and flexible. It’s great for areas that get wet.
When to Seek Professional Help
DIY window sealing works for many homeowners. But, there are times when you should get a pro. If you’re dealing with tricky jobs, like sealing windows on a tall building, it’s best to hire someone.
Also, if you’re not sure about the caulk type or how to prep the surface, getting help can save you time and money.
Cleaning Up after Caulking
Cleaning up after caulking is very important. Use a damp cloth to remove any extra caulk right away. It’s hard to get off once it dries.
| Cleanup Task | Recommended Tool | Tips |
|---|---|---|
| Removing excess caulk | Damp cloth | Act quickly before it dries |
| Smoothing caulk lines | Caulking tool or damp finger | Use a steady hand for a professional finish |
| Cleaning tools | Soap and water | Clean your tools immediately after use |
By following these tips and being aware of challenges, you can do a great DIY window sealing job. You’ll enjoy a more energy-efficient and cozy home.
Eco-Friendly Caulking Options
Green caulking options are great for homeowners who want to seal their windows without harming the environment. As more people care about the planet, the demand for eco-friendly products has grown. The caulking industry has answered with new, green solutions.
Green Sealants to Consider
There are many eco-friendly caulking choices out there. You can find caulks made from natural stuff like silicone or polyurethane, without harmful chemicals. Some top picks include:
- Low-VOC (Volatile Organic Compound) caulks
- Bio-based caulks from renewable sources
- Recycled-content caulks from post-consumer waste
These green sealants are good for the planet and keep your home cozy.
Benefits of Using Eco-Friendly Products
Using eco-friendly caulking has many perks. It’s better for the environment and:
- Improves indoor air quality by cutting down VOCs
- Creates strong, lasting seals
- Works well with many materials, like wood, metal, and glass
Choosing the right products for your windows means a tight seal that lasts.
Where to Find Sustainable Caulking Materials
You can find eco-friendly caulking at hardware stores and online. For a big selection, check out Green Building Supply. They have lots of sustainable caulking materials. Look for products with eco-labels or certifications like Greenguard Gold or SCS EcoLabel to know you’re getting something green.
Switching to eco-friendly caulking helps the planet and keeps your home sealed and healthy.
Maintaining Sealed Windows
To keep your windows working well, regular care is key. Sealed windows save energy and make your home more comfortable. With a few easy steps, your windows will last for many years.
Regular Inspections and Touch-Ups
It’s important to check your sealed windows often. Look for cracks or gaps in the caulking and fix them right away. Small repairs can stop bigger problems later. Also, check your windows after bad weather.
Seasonal Maintenance Tips
Each season brings its own challenges for windows. In spring and fall, clean your windows well to get rid of dirt. In winter, look for drafts and recaulk if needed. Weatherstripping around doors and windows helps keep a tight seal.
- Clean windows and frames often
- Fix any damage you find
- Use weatherstripping when needed
Long-Term Care for Your Windows
For long-term care, check your windows and frames regularly. Painting or sealing the frames helps protect them from rot and damage. Also, make sure your windows are aligned and work smoothly to avoid wear on the seal.
| Maintenance Task | Frequency | Benefits |
|---|---|---|
| Inspect caulking for damage | Every 6 months | Prevents water intrusion |
| Clean windows and frames | Seasonally | Maintains clarity and functionality |
| Apply weatherstripping | As needed | Reduces drafts and energy loss |
By following these tips, your sealed windows will keep your home energy-efficient, comfortable, and protected. Regular care and attention will make your windows last longer and work better over time.
Troubleshooting Common Caulking Issues
Caulking problems can be annoying, but knowing how to fix them can keep your windows sealed. Good caulking is key for keeping drafts out.
Caulk Not Adhering Properly
One big issue with caulking is when it doesn’t stick well. This might happen if the surface is dirty, damp, or not ready. To fix this, make sure the surface is clean, dry, and free of old caulk. If it still doesn’t stick, try using a primer or check the caulk’s instructions.
Cracks in Your Caulk
Cracks in caulk can be caused by many things like settling foundations or temperature changes. To fix, carefully remove the cracked part and put on new caulk. Make sure the area is clean and dry. For big cracks, you might need to caulk the whole joint again.
Peeling and Aging Caulk
When caulk starts peeling or looks old, it’s time to replace it. Check your caulk often for signs of wear like discoloration or brittleness. When you replace it, pick a good quality caulk and follow the instructions for use.
By tackling these common caulking problems, you can keep your windows sealed well. This means you’ll enjoy the benefits of good caulking.
Conclusion: The Importance of Proper Sealing Techniques
Sealing your windows right is key for saving energy, staying comfy, and making your windows last longer. By using the methods we talked about, you can cut down on energy costs and avoid water damage.
Key Takeaways
To sum up, knowing how to seal windows well means picking the best caulk, getting your window frame ready, and spreading the caulk right. Following professional caulking tips will give you a top-notch finish.
Empowering DIY Enthusiasts
With the right tools and know-how, you can confidently take on window sealing projects. Just make sure to work when the weather is good and keep your hand steady for the best outcome.
Long-Term Window Care
Regular checks and touch-ups are key to keeping your windows sealed. By keeping up with window care, you’ll have a cozier home and your windows will last longer. Learning how to seal windows is a big step towards a greener, more energy-efficient home.