Creating a professional recording space needs effective soundproofing. Unwanted noise can ruin your recordings. But, by following these 7 easy steps, you can get clearer recordings and better sound quality.
To start, reduce unwanted noise and stop sound from getting through. Add layers of drywall, use acoustic panels, and seal gaps with acoustic caulk. Also, install door sweeps. These simple steps will make your space quiet and distraction-free for recording.
In this article, we’ll talk about why soundproofing your studio is key. You’ll see how soundproof panels help. You’ll learn to soundproof different parts of a room. This will make your recording space sound professional.
Understanding the Importance of Soundproofing
To make top-notch recordings, soundproofing your studio is key. It keeps out external noise and stops sound from leaking out. This is vital for a professional recording space.
Good soundproofing means your recordings will be clear and free from noise. This is essential for making great music or voice-overs. By reducing noise in your studio, you boost sound quality and work better.
Why Soundproofing Matters for Your Studio
Soundproofing is crucial for your studio’s recording quality. Noise from outside, like neighbors or traffic, can ruin your recordings. Also, sound leaking can bother others, leading to complaints or legal trouble.
With the right studio insulation and soundproofing, you can tackle these problems. This improves your recording quality and makes your studio a better place to work.
Common Noise Sources to Consider
When soundproofing, know the common noises that can affect your recordings. These include:
- External noise from neighbors, traffic, or weather conditions
- Internal noise from household members or other rooms
- Noise from equipment and instruments in your studio
Knowing these noise sources helps you plan your soundproofing. By focusing on these areas, you can reduce noise in your studio and enhance your recordings.
Choosing the right soundproofing materials is also crucial. Different materials absorb and block sound differently. Pick materials that fit your studio’s needs best.
Assessing Your Current Space
Before you start soundproofing your home studio, it’s key to check your current space. You need to find the best soundproofing methods. This means understanding the noise levels and spotting weak spots in sound isolation.
Evaluating Noise Levels in Your Home
To figure out noise levels, find out where the noise comes from and how it impacts your studio. Start by listening carefully to the sounds around you, noting when noise is loudest. Use sound level apps or devices to measure the noise. This helps you see how much soundproofing you need.
Identifying Weak Points in Sound Isolation
After checking noise levels, find weak spots in your studio’s sound isolation. Look for gaps around doors, windows, and any cracks in walls or ceilings. Pay special attention to areas where different materials meet, as these are common sound leak spots. Knowing these weak points helps you focus your soundproofing efforts.
By checking your space and finding areas to improve, you can make a plan for soundproofing. This plan will use DIY soundproofing techniques to make your home studio quieter and more productive.
Choosing the Right Materials for Soundproofing
Setting up your home studio means picking the right soundproofing materials. The right ones help cut down on unwanted noise. They also stop sound from getting out, making your recordings sound professional.
There are many soundproofing materials to choose from. Each has its own good and bad points. Knowing these differences helps you make a smart choice.
Acoustic Panels vs. Soundproofing Foams
Acoustic panels and soundproofing foams are two common picks for soundproofing. Both aim to reduce echo and improve sound quality. But they do it in slightly different ways.
Acoustic panels mainly control echo and boost sound quality in a room. Soundproofing foams, on the other hand, soak up sound and cut down on echo.
Key differences between acoustic panels and soundproofing foams:
| Material | Purpose | Effectiveness |
|---|---|---|
| Acoustic Panels | Control reverberation, improve sound quality | Highly effective for sound quality improvement |
| Soundproofing Foams | Absorb sound, reduce echo | Effective for reducing echo, but may not improve sound quality |
Mass Loaded Vinyl: An Effective Sound Barrier
Mass loaded vinyl is a thin, flexible sheet made of vinyl and heavy metal particles. It’s made to block sound from passing through walls, ceilings, and floors. It’s great for soundproofing because it’s both flexible and tough.
Benefits of using mass loaded vinyl include:
- Effective sound barrier
- Flexible and easy to install
- Durable and long-lasting
By picking the right materials like acoustic panels, soundproofing foams, and mass loaded vinyl, you can greatly enhance your home studio’s sound quality. Each material has its own strengths. Knowing these helps you make the best choices for your soundproofing needs.
Sealing Gaps and Cracks
Sound leakage through gaps and cracks is a big problem in home studios. But, there’s a simple fix. Sealing these openings is key to keep sound from escaping or getting in, keeping your studio soundproofed.
Where to Look for Gaps in Your Studio
To seal gaps well, first find where they are. Check around doors, windows, electrical outlets, and any wall or ceiling joints. A flashlight helps spot hidden gaps.
Recommended Sealants for Effective Soundproofing
After finding gaps, you need the right stuff to seal them. Acoustic caulk and weatherstripping work great. Acoustic caulk stays flexible and absorbs vibrations. Weatherstripping around doors and windows cuts down sound leakage.
| Sealant Type | Application | Effectiveness |
|---|---|---|
| Acoustic Caulk | Gaps around electrical outlets, joints, and seams | High |
| Weatherstripping | Around doors and windows | High |
| Spray Foam | Larger gaps in walls and ceilings | Medium to High |
By sealing gaps and cracks with the right soundproofing materials and methods, you can greatly improve your home studio’s soundproofing.
Flooring Solutions for Sound Isolation
Sound isolation in your home studio begins with the floor. The flooring you pick greatly affects sound quality and isolation. Good flooring can cut down on noise and stop sound from spreading.
You have many flooring choices, each with its own pros and cons. Carpet and hard flooring are two common options. Knowing the differences is key to making the right choice.
Carpet vs. Hard Flooring: What’s More Effective?
Carpet is known for absorbing sound well because of its texture and density. It can lessen echo and footstep noise, making it great for studios. Hard flooring, though harder to soundproof, can be improved with the right underlayment.
| Flooring Type | Sound Absorption | Installation Ease |
|---|---|---|
| Carpet | High | Easy |
| Hard Flooring | Low | Moderate to Hard |
Incorporating Underlays for Added Absorption
Adding underlays to carpet or hard flooring boosts sound isolation. Underlays add an extra layer of sound absorption, cutting down on noise.
Key benefits of underlays include:
- Improved sound absorption
- Reduced noise transmission
- Enhanced overall sound quality
Choosing the right flooring and underlay combo can greatly improve your studio’s sound isolation. This boosts your recording quality and makes your workspace more comfortable.
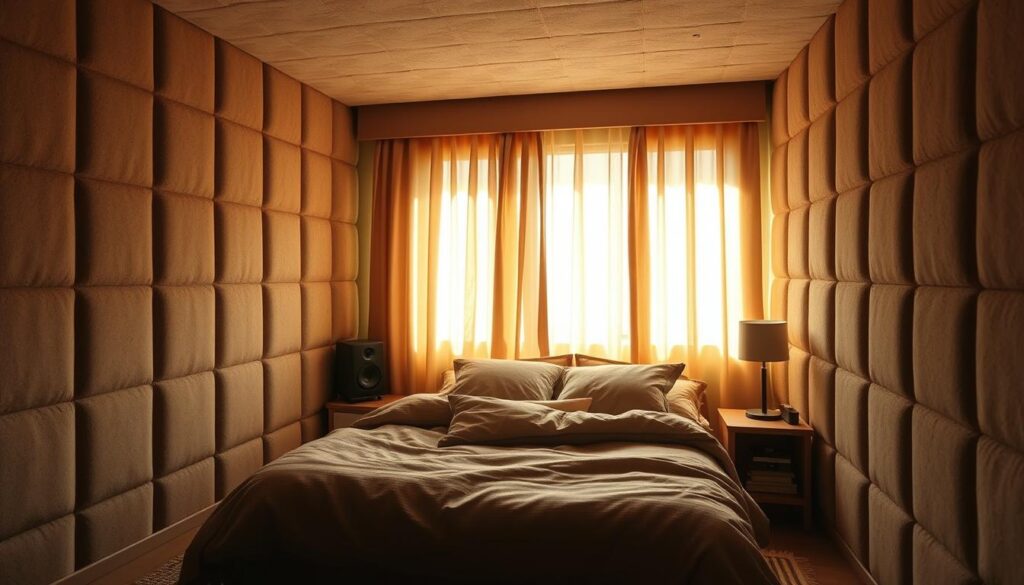
Wall Treatments to Reduce Noise
Effective wall treatments are key to reducing noise in your home studio. The right strategies can minimize echo and stop sound from spreading. This makes your recording and mixing space better controlled.
To soundproof well, pick the right wall treatments for your space. Acoustic panels are great for absorbing sound and cutting down on echo. They make your studio sound better.
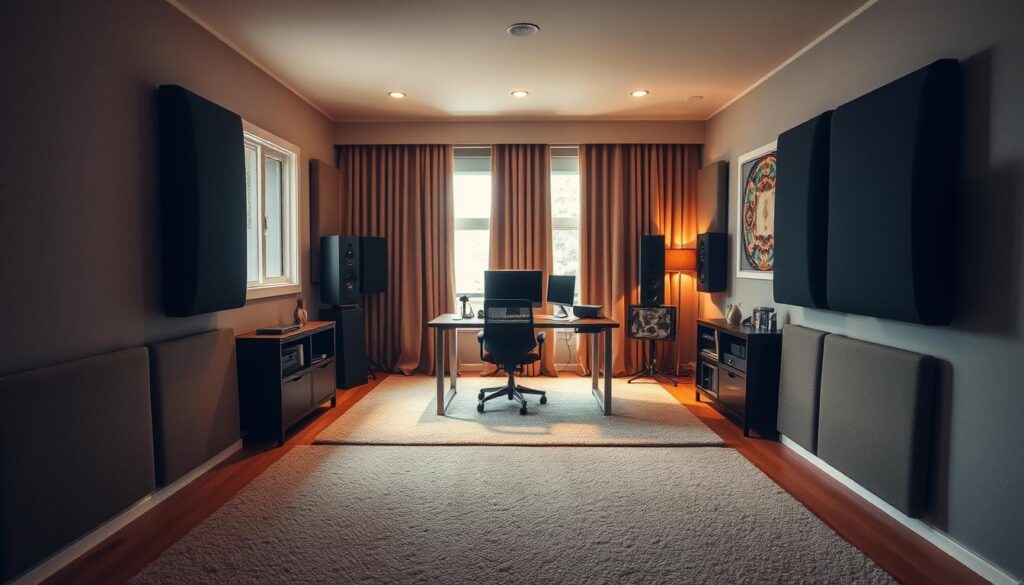
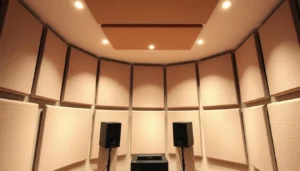
Installing Acoustic Panels for Maximum Effect
When putting up acoustic panels, think about where to place them. Putting them on walls and ceilings can make them work better. For example, corners are good spots to tackle sound reflections and echo.
Check out Overtone Acoustics for a variety of acoustic panels. They have DIY and professional options to fit your needs.
Acoustic panels vary in material, size, and design. Pick the right ones to cut down on noise and improve sound clarity.
The Role of Bass Traps in Echo Reduction
Bass traps are also key in reducing low sounds and echo. They soak up low frequencies, reducing resonance and echo. Adding bass traps to your wall treatments boosts your studio’s sound quality.
Bass traps work best in corners or against walls, where low sounds build up. They help balance your sound environment by reducing bass notes.
Using both acoustic panels and bass traps creates a solid soundproofing plan. This covers all frequencies, making your sound environment more controlled and accurate. It’s perfect for recording, mixing, and mastering.
Improving Door and Window Soundproofing
Soundproofing is not just about walls. Doors and windows are also key. To make your home studio soundproof, focus on these areas with the right methods and materials.
Doors and windows are weak spots for sound. Sound can sneak through gaps, ruining your studio’s sound. Use the right techniques to block unwanted noise and keep sound in.
Types of Soundproof Doors to Consider
There are many soundproof door options. Solid core or solid wood doors block sound better than hollow ones. You can also get a soundproof door made for sound isolation. These doors have sound-absorbing materials and a tight seal to stop sound leaks.
- Solid core or solid wood doors for better sound blocking
- Soundproof doors designed for sound isolation
- Acoustic seals or weatherstripping to seal gaps around doors
How to Reinforce Windows for Better Isolation
Windows can let sound in, but you can make them soundproof. Use acoustic window panels or soundproof window inserts over your windows. You can also apply window sealants or weatherstripping to seal gaps.
By using these methods for doors and windows, you can greatly enhance your home studio’s sound. Choose the best solutions for your space based on your needs.
Air Quality and Ventilation While Soundproofing
A well-ventilated home studio is key for sound quality and health. Soundproofing blocks out noise but also seals your space. This can make it stale and uncomfortable.
To keep your studio healthy and productive, balance soundproofing with ventilation. Use soundproofing products for your home studio that block noise and let air flow.
Maintaining Airflow Without Compromising Soundproofing
Keeping air flowing in a soundproofed studio is a big challenge. Use acoustic vents or silent fans to let air in without letting noise out.
Another good idea is a ventilation system made for soundproofed spaces. These systems have silencers and baffles to keep your studio quiet and comfy.
Effective Options for Quiet Ventilation Systems
There are many quiet ventilation systems for your studio. Some top picks include:
- Inline fans for ducts to cut down on noise
- Silencer boxes to reduce sound through vents
- Acoustic silencers for ventilation openings
Adding these solutions to your soundproofing plan makes a quiet, well-ventilated studio. Good studio insulation also keeps sound quality and comfort up.
Final Touches for Your Soundproof Home Studio
Now that you’ve soundproofed your home studio, it’s time for the final touches. Soundproofing needs detail and dedication to keep your space great.
Expert Guidance for Complex Projects
For tough soundproofing jobs, get professional help. Acoustic experts can offer great advice and help you get the best results. Check out soundproofing resources for tips on soundproofing a home studio.
Maintaining Your Soundproofing System
Keeping your soundproofing system in top shape is key. Look for gaps, clean your gear, and tweak as needed. With these steps, your recording space will stay top-notch for years, thanks to great acoustic treatment.